前回までで設定画面の作り方からカスタマイズの仕方まで記載しました。今回は設定画面から設定した値を MainActivity で取得して利用する方法について記載します。
前回作成したプロジェクト 5_preference_CustomMenu を使って SettingsActivity 設定画面で設定した値を MainActivity で取得して画面に表示できるように変更を加えていきます。
設定値の参照
SettingsActivity から MainActivity に戻った時に設定値を参照するように onResume() メソッドを使います。
protected void onResume() {
    super.onResume();
設定値の参照を行うためにはまず SharedPreference インスタンスを取得します。
SharedPreferences prefs = getSharedPreferences("com.example.myapplication_preferences",MODE_PRIVATE);
カッコ内の第一引数は “パッケージ名_preference” とします。
( 例 “com.example.myapplication_preference” )
設定値の取得は次のように記述します。
Boolean b_check1 = prefs.getBoolean("check_box_preference_1",false);
Boolean b_check2 = prefs.getBoolean("check_box_preference_2",false);
String b_edittext = prefs.getString("edit_text_preference_1","edittext");
取得したインスタンスから getBoolean()で論理型、getString()で文字列型の値を得ることができます。カッコ内の第一引数は root_preferene.xml に記述されている key を参照することで紐づけされます。第二引数はデフォルト値を入力します。
設定値の表示
MainActivity 画面に設定値を表示するために activity_main.xml を以下のように書き換えます。
<?xml version="1.0" encoding="utf-8"?>
<RelativeLayout xmlns:android="http://schemas.android.com/apk/res/android"
    xmlns:tools="http://schemas.android.com/tools"
    android:id="@+id/main"
    android:layout_width="match_parent"
    android:layout_height="match_parent"
    tools:context=".MainActivity">

    <TextView
        android:id="@+id/text_check1"
        android:layout_width="180sp"
        android:layout_height="wrap_content"
        android:layout_alignParentTop="true"
        android:layout_marginStart="20dp"
        android:layout_marginTop="50dp"
        android:text="Checkbox 1"
        android:textSize="20sp" />

    <TextView
        android:id="@+id/text_check2"
        android:layout_width="180sp"
        android:layout_height="wrap_content"
        android:layout_alignTop="@+id/text_check1"
        android:layout_marginStart="20dp"
        android:layout_marginTop="50dp"
        android:text="Checkbox 2"
        android:textSize="20sp" />

    <TextView
        android:id="@+id/text_edittext"
        android:layout_width="wrap_content"
        android:layout_height="wrap_content"
        android:layout_alignTop="@+id/text_check2"
        android:layout_marginStart="20dp"
        android:layout_marginTop="50dp"
        android:text="edittext"
        android:textSize="20sp" />

</RelativeLayout>
MainActivity.java に以下の項目を追加します。
MainActivity クラス下に、
private TextView text_check1;
private TextView text_check2;
private TextView text_edittext;
onCreate メソッド下に、
text_check1 = findViewById(R.id.text_check1);
text_check2 = findViewById(R.id.text_check2);
text_edittext = findViewById(R.id.text_edittext);
onResume メソッド下に、
text_check1.setText("check box 1 = " + String.valueOf(b_check1));
text_check2.setText("check box 2 = "+ String.valueOf(b_check2));
text_edittext.setText("EditText = "+ b_edittext);
これで SettingsActivity 設定画面から MainActivity 画面に戻った時に設定値が参照されて表示できるようになります。
MainActivity.java 全体は次のようになります。
package com.example.myapplication;

import android.annotation.SuppressLint;
import android.content.Intent;
import android.content.SharedPreferences;
import android.os.Bundle;
import android.view.Menu;
import android.view.MenuItem;
import android.widget.TextView;

import androidx.activity.EdgeToEdge;
import androidx.appcompat.app.AppCompatActivity;
import androidx.core.graphics.Insets;
import androidx.core.view.ViewCompat;
import androidx.core.view.WindowInsetsCompat;

public class MainActivity extends AppCompatActivity {

    private TextView text_check1;
    private TextView text_check2;
    private TextView text_edittext;

    @SuppressLint("MissingInflatedId")
    @Override
    protected void onCreate(Bundle savedInstanceState) {
       super.onCreate(savedInstanceState);
       EdgeToEdge.enable(this);
       setContentView(R.layout.activity_main);
       ViewCompat.setOnApplyWindowInsetsListener(findViewById(R.id.main), (v, insets) -> {
          Insets systemBars = insets.getInsets(WindowInsetsCompat.Type.systemBars());
          v.setPadding(systemBars.left, systemBars.top, systemBars.right, systemBars.bottom);
          return insets;
       });

       text_check1 = findViewById(R.id.text_check1);
       text_check2 = findViewById(R.id.text_check2);
       text_edittext = findViewById(R.id.text_edittext);

    }

    protected void onResume() {
       super.onResume();

       // SharedPreference インスタンスを取得
       SharedPreferences prefs = getSharedPreferences("com.example.myapplication_preferences",MODE_PRIVATE);
       // あとは各設定値を参照するだけ
       Boolean b_check1 = prefs.getBoolean("check_box_preference_1",false);
       Boolean b_check2 = prefs.getBoolean("check_box_preference_2",false);
       String b_edittext = prefs.getString("edit_text_preference_1","edittext");
       text_check1.setText("check box 1 = " + String.valueOf(b_check1));
       text_check2.setText("check box 2 = " + String.valueOf(b_check2));
       text_edittext.setText("EditText = " + b_edittext);

    }

    // オプションメニュー作成時の処理
    @Override
    public boolean onCreateOptionsMenu( Menu menu )
    {
       getMenuInflater().inflate( R.menu.options, menu );
       return true;
    }

    // オプションメニューのアイテム選択時の処理
    @Override
    public boolean onOptionsItemSelected( MenuItem item )
    {
       if( R.id.menu_true_settings == item.getItemId() )
       {
          Intent intent = new Intent( this, SettingsActivity.class );
          startActivity( intent );
          return true;
       }
       return false;
    }

}
実行結果
エミュレータを起動して立ち上げると初期画面が現れます。(図1)
アクションバーのメニューをタップするとメニューが表示されます。(図2)
メニューから「設定」を選択すると SettingsActivity 設定画面が表示されます。(図3)
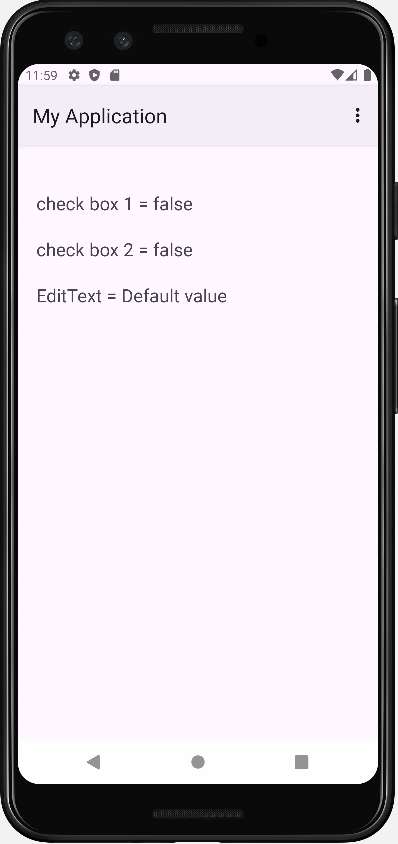
図1 初期画面
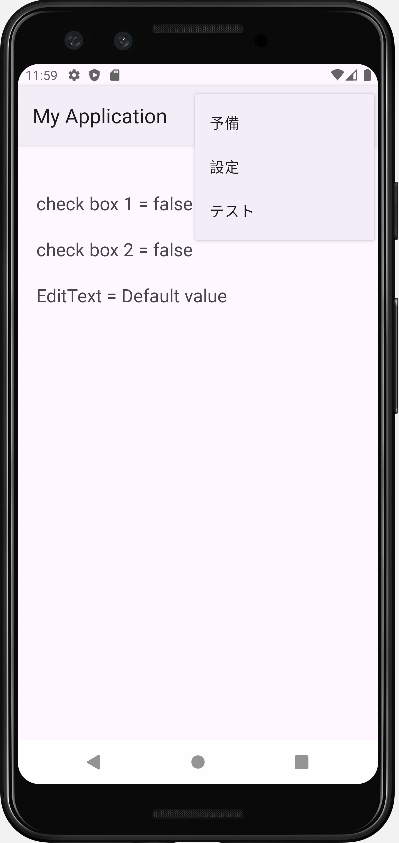
図2 メニュー表示
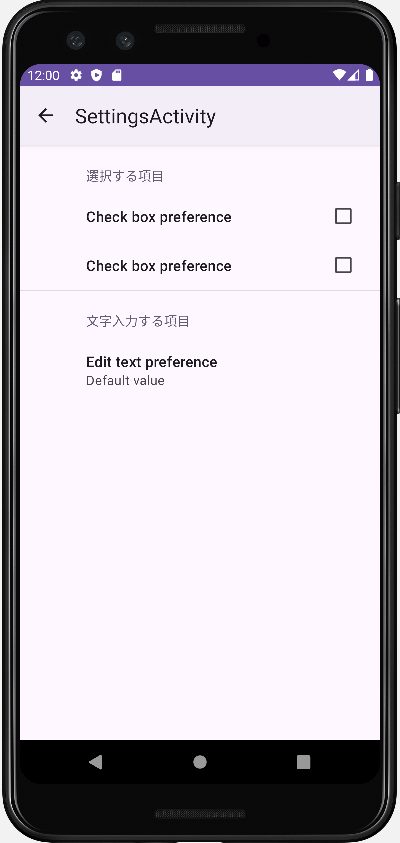
図3 設定画面
選択する項目の1つ目のチェックボックスにチェックを付けて、文字入力する項目に任意の文字「September October」と入力します。(図4)
文字入力が終わって「OK」をタップすると設定画面に内容が反映されています。(図5)
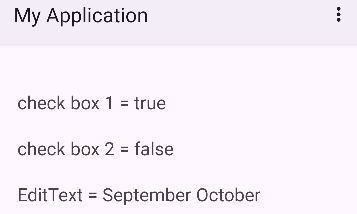
アクションバーの「←」戻るをタップすると MainActivity に戻り、設定値が画面に表示されているのが確認できます。(図6)
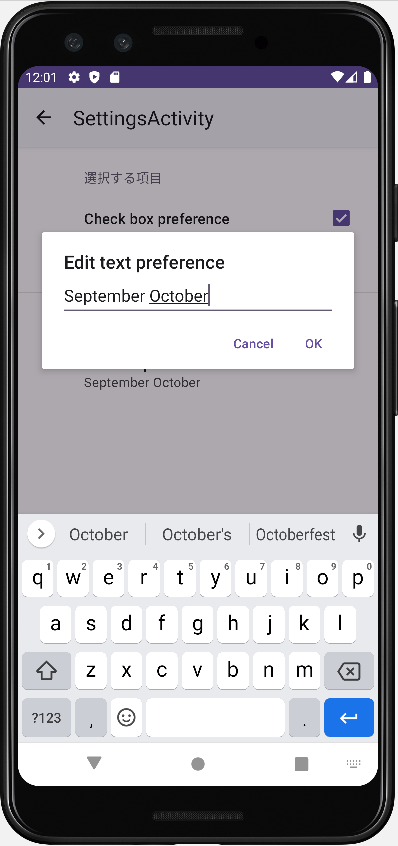
図4 チェックと文字入力

図5 「OK」タップ後画面
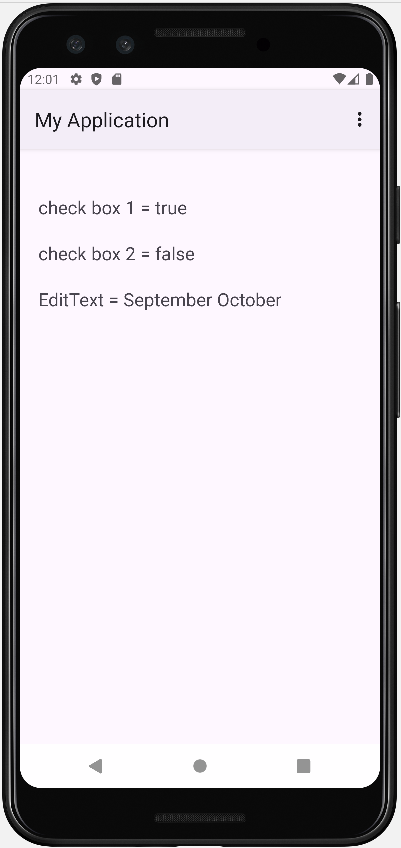
図6 MainActivity 画面で設定値を確認
プロジェクト全体は GitHub にアップロードしています。
6_preference_Final
【関連リンク】
設定アクティビティの作成
Android Studio 設定画面の作り方からアクティビティで参照する方法まで(1)
設定アクティビティのカスタマイズ
Android Studio 設定画面の作り方からアクティビティで参照する方法まで(2)
なお、Nobuki HIRAMINE さんの「設定アクティビティの作成」は設定アクティビティに関して 5回シリーズで詳細にわかりやすく記載されていて非常に役立つ内容となっています。
Appendix: 設定値が格納されているファイルを確認する
・エミュレータを実行します。(エミュレータを実行して設定の変更を行うと自動的にファイルが生成されます。)
・設定画面を開いて設定値の変更を行います。
・表示 > ツールウィンドゥ > Device Exploler (図A1)
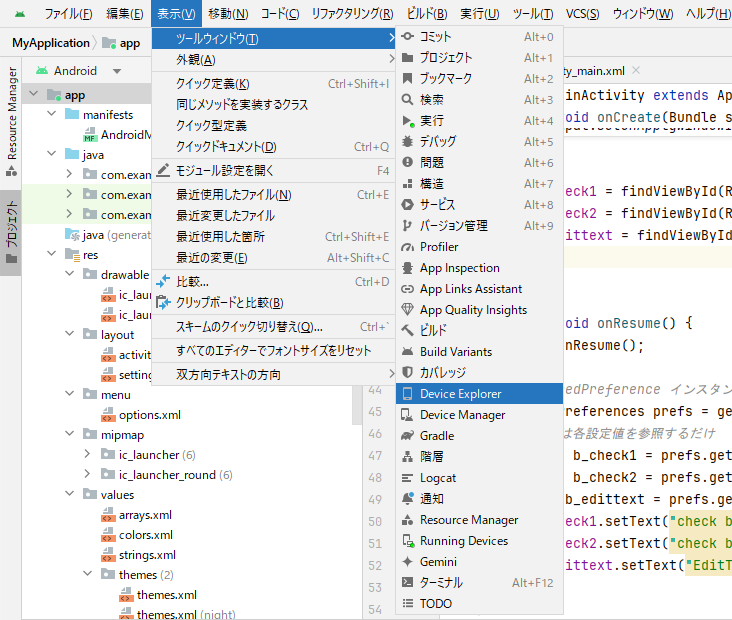
図A1
Device Exploler から次のファイル名を探してみます。(図A2)
・data\data\com.example.myapplication\shared_prefes\com.example.myapplication_preference.xml
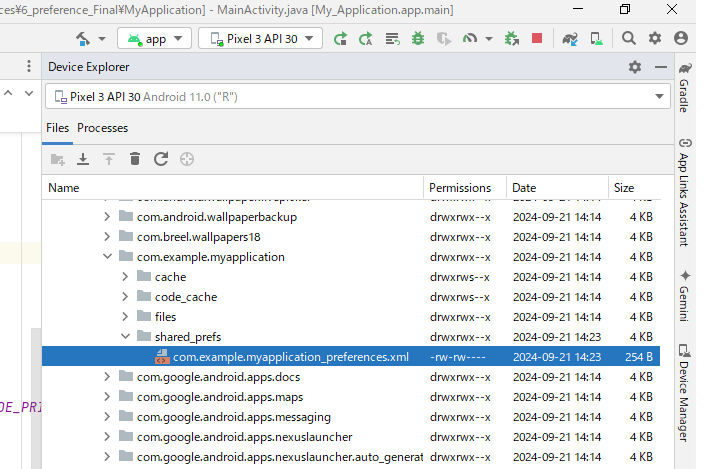
図A2
ダブルクリックしてファイルを開いてみます。(図A3)
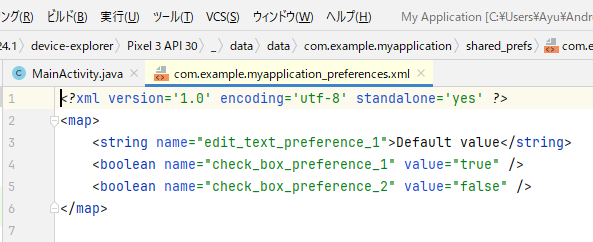
図A3
(YI)
コメント