
はじめに
これまで ESP32を使って学習リモコンを作る(3)~(6) で説明してきたソフトウエアの要素技術に基づいて開発した Smart Remote Controller (以下、本機)のソフトウエアについて説明します。 ソフトウエア要素技術 ・赤外線リモコン受信(irReceive) ・赤外線リモコン送信(irSend) ・webserver ・FLASH読書き(SPIFFS) 本機プロジェクトは GitHub にアップロードしています。 Smart_Remote_Controller プロジェクト GitHub 本機プロジェクトの勘所は、ESP32を使って学習リモコンを作る(8) を参照ください。ハードウエア
本機のハードウエアは ESP32を使って学習リモコンを作る(2) で説明しています。回路図は図1 と 図3、外観は図5 を参照します。 (ESP32を使って学習リモコンを作る(3)~(6) の回路図はソフトウエア要素技術の確認用としてリモコン受光IC が常時動作する設定のため本機には使用できません。本機との差異は赤外線受光回路の抵抗 R2 が ESP32 の 33ピンに接続されるか、VDD 電源に接続されるかの違いのみです。)ソフトウエア開発環境
本機のソフトウエア開発環境は ESP32を使って学習リモコンを作る(3) を参照してください。新しいプロジェクトの作成
Visula Studio Code ( VSCode ) を開いて画面左端縦の「アクティビティバー」からアリさんマーク(赤丸)をクリックします。(図1)
*図1 Visual Studio Code を開く
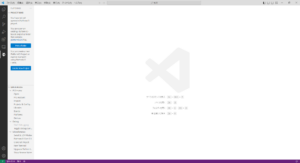
*図2 プライマリサイドバー
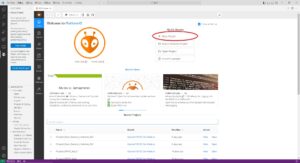
*図3 PIO Home
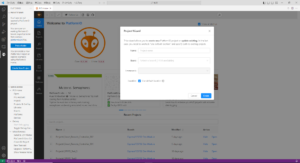
*図4 Project Wizard

*図5 Project Wizard に必要事項を入力した
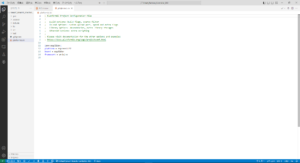
*図6 プロジェクトが自動生成された
ライブラリ
IRremote、ESP Async WebServer と AsysncTCP の 3 つのライブラリが必要になります。IRremote は platformio.ini にライブラリ依存性を定義すると自動的にインストールされます。 ESP Async WebServer と AsysncTCP は Built-in で組み込まれているので何もする必要はありません。本機プロジェクトの作成
自動生成されたプロジェクトに追加、変更を加えて本機のプロジェクトに対応させます。 platformio.ini ファイルに以下の 3 行を追加します。(図7)lib_deps = lib_deps = z3t0/IRremote@^4.4.1 (ライブラリ名を訂正しました)
upload_port = COM3 (使用する PC に合わせてください)
monitor_speed = 115200
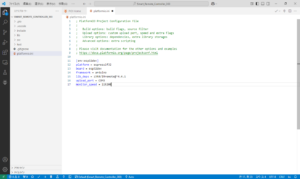
*図7 platformio.ini に3行追加
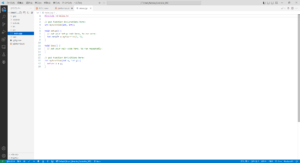
*図8 main.cpp
//+++++++++++++++++++++++++++++++++++++++++++++++++++++++++++++++++++++++++++++++++++++++++++++//
// Smart_Remote_Controller 20241209 Ver.303                                                    //
//+++++++++++++++++++++++++++++++++++++++++++++++++++++++++++++++++++++++++++++++++++++++++++++//
#include <Arduino.h>
#include <stdio.h>
#include <SPIFFS.h>

//(11) ------------ irReceive に必要な定義 -----------------------------------------------------//
#include "irReceive.h"
// 端子定義
#define ena_receive_PIN 33  // irReceive レベルシフト回路の動作開始、停止
// 型定義
char m_buf[1]; // 整数を文字列に変換するためのバッファ
String ProntoHEX = F(""); // ProntoHex オブジェクト初期化

// (21) -----------  irSend に必要な定義 -------------------------------------------------------//
//                                                                                             //
// #include <IRremote.hpp> は irReceive.h ですでに include されている。                          //
//                                                                                             //
// 信号出力端子は PinDefinitionAndMore.h で定義され irReceive.h でこれを include している。        //
// PinDefinitionAndMore.h #define IR_SEND_PIN 4  // D4                                         //
//                                                                                             //
//---------------------------------------------------------------------------------------------//
// プロトタイプ宣言
void send_IR_process( String readStr );

// (31) ----------- webserver に必要な定義 -----------------------------------------------------//
#include "webserver.h"

// (41) ----------- SPIFFS ( store, restore ) に必要な定義 -------------------------------------//
// プロトタイプ宣言
void store_FLASH( String wrfile,String writeStr );
String restore_FLASH( String wrfile );

// (51) ----------- そのほかの定義、グローバル変数定義 -------------------------------------------//
// プロトタイプ宣言
void bt_response(String bt_label, String bt_name); // ボタンレスポンス

//グローバル変数定義
static String status_information = "情報表示";
static String wrfolder; // 書込み、読出しフォルダ名
static String wrfile;   // 書込みファイル名
static String writeStr; // 書込み文字列
static String readStr;  // 読出し文字列
static int num_reg;     // 「リモコン送信」ボタンに登録するリモコン信号の登録数カウンタ
static String bt_id = "0"; // リモコン信号を複数登録中にリモコン送信ボタンが変更されたか識別用

//フラグとして使用するグローバル変数定義
static bool ena_send = false;     // irSend 許可
static bool ena_store = false;    // FLASH 書込み許可
static bool ena_restore = false;  // FLASH 読出し許可
static bool ena_assign = false;   // 信号登録許可

//+++++++++++++++++++++++++++++++++++++++++++++++++++++++++++++++++++++++++++++++++++++++++++++//
// setup                                                                                       //
//+++++++++++++++++++++++++++++++++++++++++++++++++++++++++++++++++++++++++++++++++++++++++++++//

void setup() {

 // (13) ---------- irReceive setup -----------------------------------------------------------//
  //void irReceive_setup();
  pinMode(LED_BUILTIN, OUTPUT);
  pinMode(ena_receive_PIN, OUTPUT); //irReceive レベルシフト回路にバイアス電圧を加えるにより動作、停止を制御する
  digitalWrite(ena_receive_PIN, LOW); //初期状態を LOW 停止に設定する
  num_reg = 0;

  Serial.begin(115200);   // Status message will be sent to PC at 9600 baud
  while (!Serial)     ; // Wait for Serial to become available. Is optimized away for some cores.

  #if defined(__AVR_ATmega32U4__) || defined(SERIAL_PORT_USBVIRTUAL) || defined(SERIAL_USB) /*stm32duino*/|| defined(USBCON) /*STM32_stm32*/ \
   || defined(SERIALUSB_PID)  || defined(ARDUINO_ARCH_RP2040) || defined(ARDUINO_attiny3217)
    delay(4000); // To be able to connect Serial monitor after reset or power up and before first print out. Do not wait for an attached Serial Monitor!
  #endif
  // Just to know which program is running on my Arduino
  Serial.println(F("START " __FILE__ " from " __DATE__ "\r\nUsing library version " VERSION_IRREMOTE));

  // Start the receiver and if not 3. parameter specified, take LED_BUILTIN pin from the internal boards definition as default feedback LED
  IrReceiver.begin(IR_RECEIVE_PIN, ENABLE_LED_FEEDBACK);

  Serial.print(F("Ready to receive IR signals of protocols: "));
  printActiveIRProtocols(&Serial);
  Serial.println(F("at pin " STR(IR_RECEIVE_PIN)));

  // infos for receive
  Serial.print(RECORD_GAP_MICROS);
  Serial.println(F(" us is the (minimum) gap, after which the start of a new IR packet is assumed"));
  Serial.print(MARK_EXCESS_MICROS);
  Serial.println();
  Serial.println(F("Because of the verbose output (>200 ms at 115200 baud), repeats are not dumped correctly!"));
  Serial.println();
  Serial.println(F("If you receive protocol NEC, Samsung or LG, run also ReceiveDemo to check if your actual protocol is eventually NEC2 or SamsungLG, which is determined by the repeats"));
  Serial.println();

 // (22) ----------- irSend setup -------------------------------------------------------------//
  Serial.begin(115200);
  IrSender.begin();

 // (33) ----------- webserver setup ----------------------------------------------------------//
  doInitialize();             // 初期化処理をして
  connectToWifi();            // Wi-Fiルーターに接続する
  configTime(gmtOffset_sec, 0, ntpServer);  // まず時刻を合わせる

 // (42) ----------- SPIFFS setup -------------------------------------------------------------//
  //SPIFFSのセットアップ
  if (!SPIFFS.begin(true)) {
   Serial.println("An Error has occurred while mounting SPIFFS");
   return;
  }

 // (34) ----------- ブラウザ表示 setup --------------------------------------------------------//
  //index.htmlにアクセスされた時のレスポンス
  server.on("/", HTTP_GET, [](AsyncWebServerRequest * request) {
    request->send(SPIFFS, "/index.html", String(), false, editPlaceHolder);
  });
  //style.cssにアクセスされた時のレスポンス
  server.on("/style.css", HTTP_GET, [](AsyncWebServerRequest * request) {
    request->send(SPIFFS, "/style.css", "text/css");
  });
  //js.jsにアクセスされた時のレスポンス
  server.on("/js.js", HTTP_GET, [](AsyncWebServerRequest * request) {
    request->send(SPIFFS, "/js.js", "js/js");
  });
  //curtime リクエストに対するレスポンス
  server.on("/curtime", HTTP_GET, [](AsyncWebServerRequest *request){
    request->send_P(200, "text/plain", getCurTime().c_str());
  });
  /*
  //message リクエストに対するレスポンス
  server.on("/message", HTTP_GET, [](AsyncWebServerRequest *request){
    request->send_P(200, "text/plain", getMessage().c_str());
  });
  */
  //msg_information リクエストに対するレスポンス
  server.on("/msg_information", HTTP_GET, [](AsyncWebServerRequest *request){
    request->send_P(200, "text/plain", getMsg_information().c_str());
  });

 // (52) ------- リモコン送信ボタンレスポンス setup ( bt_1 ~ bt_16 )---------------------------//
  //「bt_1」ボタンに対するレスポンス
  server.on("/bt_1", HTTP_GET, [](AsyncWebServerRequest *request){
    bt_response ("1", "TV 電源");
    request->send_P(200, "text/plain", getMsg_information().c_str());
  });
  //「bt_2」ボタンに対するレスポンス
  server.on("/bt_2", HTTP_GET, [](AsyncWebServerRequest *request){
    bt_response ("2", "TV 入力");
    request->send_P(200, "text/plain", getMsg_information().c_str());
  });
  //「bt_3」ボタンに対するレスポンス
  server.on("/bt_3", HTTP_GET, [](AsyncWebServerRequest *request){
    bt_response ("3", "TV 消音");
    request->send_P(200, "text/plain", getMsg_information().c_str());
  });
  //「bt_4」ボタンに対するレスポンス
  server.on("/bt_4", HTTP_GET, [](AsyncWebServerRequest *request){
    bt_response ("4", "予備_bt_4");
    request->send_P(200, "text/plain", getMsg_information().c_str());
  });
  //「bt_5」ボタンに対するレスポンス
  server.on("/bt_5", HTTP_GET, [](AsyncWebServerRequest *request){
    bt_response ("5", "TV CH+");
    request->send_P(200, "text/plain", getMsg_information().c_str());
  });
  //「bt_6」ボタンに対するレスポンス
  server.on("/bt_6", HTTP_GET, [](AsyncWebServerRequest *request){
    bt_response ("6", "TV 地上");
    request->send_P(200, "text/plain", getMsg_information().c_str());
  });
  //「bt_7」ボタンに対するレスポンス
  server.on("/bt_7", HTTP_GET, [](AsyncWebServerRequest *request){
    bt_response ("7", "TV Vol+");
    request->send_P(200, "text/plain", getMsg_information().c_str());
  });
  //「bt_8」ボタンに対するレスポンス
  server.on("/bt_8", HTTP_GET, [](AsyncWebServerRequest *request){
    bt_response ("8", "予備_bt_8");
    request->send_P(200, "text/plain", getMsg_information().c_str());
  });
  //「bt_9」ボタンに対するレスポンス
  server.on("/bt_9", HTTP_GET, [](AsyncWebServerRequest *request){
    bt_response ("9", "TV CHー");
    request->send_P(200, "text/plain", getMsg_information().c_str());
  });
  //「bt_10」ボタンに対するレスポンス
  server.on("/bt_10", HTTP_GET, [](AsyncWebServerRequest *request){
    bt_response ("10", "TV BS");
    request->send_P(200, "text/plain", getMsg_information().c_str());
  });
  //「bt_11」ボタンに対するレスポンス
  server.on("/bt_11", HTTP_GET, [](AsyncWebServerRequest *request){
    bt_response ("11", "TV Vol-");
    request->send_P(200, "text/plain", getMsg_information().c_str());
   });
  //「bt_12」ボタンに対するレスポンス
  server.on("/bt_12", HTTP_GET, [](AsyncWebServerRequest *request){
    bt_response ("12", "予備_bt_12");
    request->send_P(200, "text/plain", getMsg_information().c_str());
  });
  //「bt_13」ボタンに対するレスポンス
  server.on("/bt_13", HTTP_GET, [](AsyncWebServerRequest *request){
    bt_response ("13", "BOSE On");
    request->send_P(200, "text/plain", getMsg_information().c_str());
  });
  //「bt_14」ボタンに対するレスポンス
  server.on("/bt_14", HTTP_GET, [](AsyncWebServerRequest *request){
    bt_response ("14", "BOSE Off");
    request->send_P(200, "text/plain", getMsg_information().c_str());
  });
  //「bt_15」ボタンに対するレスポンス
  server.on("/bt_15", HTTP_GET, [](AsyncWebServerRequest *request){
    bt_response ("15", "BOSE Vol+");
    request->send_P(200, "text/plain", getMsg_information().c_str());
  });
  //「bt_16」ボタンに対するレスポンス
  server.on("/bt_16", HTTP_GET, [](AsyncWebServerRequest *request){
    bt_response ("16", "BOSE Vol-");
    request->send_P(200, "text/plain", getMsg_information().c_str());
  });

  /* リモコン送信ボタンを追加する場合は、ここに追加していく。

   (例)「bt_16」ボタンに対するレスポンス
    server.on("/bt_16", HTTP_GET, [](AsyncWebServerRequest *request){
      bt_response ("16", "BOSE Vol-");
      request->send_P(200, "text/plain", getMsg_information().c_str());
    });
  */

 // (53)------- モード切換、制御ボタンレスポンス setup ( bt_mode, bt_c1 ~ bt_c4 )----------------//
  //モード切換ボタンに対するレスポンス
  server.on("/mode", HTTP_GET, [](AsyncWebServerRequest *request){
    Serial.println("モード切換ボタンが押されました。"); //ターミナルにメッセージ出力
    status_information = "モード切換ボタンが押されました。"; //クライアント側で情報を表示する
    request->send_P(200, "text/plain", getMsg_information().c_str());
  });
  //capture 「取込」ボタン bt_c1 に対するレスポンス
  server.on("/capture", HTTP_GET, [](AsyncWebServerRequest *request){
    Serial.println("\n「取込」ボタンが押されました。"); //ターミナルにメッセージ出力
    digitalWrite(ena_receive_PIN, HIGH); //irReceive レベルシフト回路の動作を開始
    status_information = "「取込」を開始します。リモコン送信機のボタンを押してください。"; //クライアント側で情報を表示する
    request->send_P(200, "text/plain", getMsg_information().c_str());
  });
  //memory 「登録」ボタン bt_c2 に対するレスポンス
  server.on("/memory", HTTP_GET, [](AsyncWebServerRequest *request){
    Serial.println("\n「登録」ボタンが押されました。"); //ターミナルにメッセージ出力
    digitalWrite(ena_receive_PIN, LOW); //irReceive レベルシフト回路の動作を停止
    ena_store = true;
    num_reg = num_reg + 1; //「リモコン送信」ボタンに登録する登録数を加算する
    status_information = "登録を開始します。\n登録する「任意」のボタンを押してください。"; //クライアント側で情報を表示する
    request->send_P(200, "text/plain", getMsg_information().c_str());
  });
  //finish 「終了」ボタン bt_c3 に対するレスポンス
  server.on("/finish", HTTP_GET, [](AsyncWebServerRequest *request){
    Serial.println("\n「終了」ボタンが押されました。"); //ターミナルにメッセージ出力
    digitalWrite(ena_receive_PIN, LOW); //irReceive レベルシフト回路の動作を停止。
    ena_send = false; //irsend を禁止
    ena_store = false; //FLASH 書込みを禁止
    ena_restore = false; //FLASH 読出しを禁止
    ena_assign = false; //信号登録禁止
    status_information = "取込、登録を終了しました。"; //クライアント側で情報を表示する
    num_reg = 0; //登録数カウンタをリセットする
    request->send_P(200, "text/plain", getMsg_information().c_str());
  });
  //予備ボタン bt_c4 に対するレスポンス
  server.on("/bt_c4", HTTP_GET, [](AsyncWebServerRequest *request){
    Serial.print("Button bt_c4 pushed : "); //ターミナルにメッセージ出力
    status_information = "Button bt_c4 pushed : "; //クライアント側で情報を表示する
    request->send_P(200, "text/plain", getMsg_information().c_str());
  });

 // (35)-------- webserver setup --------------------------------------------------------------//
  //サーバーを開始する
  server.begin();

}

//+++++++++++++++++++++++++++++++++++++++++++++++++++++++++++++++++++++++++++++++++++++++++++++//
// Loop                                                                                        //
//+++++++++++++++++++++++++++++++++++++++++++++++++++++++++++++++++++++++++++++++++++++++++++++//

void loop() {

  // (14) ------------- receive_IR_process ----------------------------------------------------//
  // 「取込」ボタンを押すと、digitalWrite(ena_receive_PIN, HIGH); //irReceive によりレベルシフト回路
  //  が動作してリモコン信号受信回路から「取込」を開始できるようになる。

  receive_IR_process( ); //この関数を実行すると戻り値 writeStr が得られる。

  // (43) -----------「登録」ボタンに続けて「リモコン送信」ボタンが押された時の処理 -----------------//

  if ((ena_store == true) && (ena_assign == true)){ //FLASH 書込み許可、信号登録許可 の場合

    // rceive_IR_process(); で受信した信号 writeString を FLASH に書込む。
    // ファイル名は、登録するボタン名に対応した wrfolder と 登録数カウンタ num_reg から生成する。
    // 登録数カウンタ num_reg は「登録」ボタンを押すごとに +1 インクリメントされる。
    // (例) bt_1 の場合 wrfile = "/bt_1/bt_1_1.txt"

    wrfile = wrfolder + wrfolder + "_" + num_reg + ".txt";
    store_FLASH( wrfile, writeStr ); //受信した信号を FLASH に書込む

    // 当該「リモコン送信」ボタンにリモコン信号が何個登録されたかを示す登録数カウンタ num_reg を FLASH に書込む。
    // (例) bt_1 の場合 wrfile = "/bt_1/num_reg.txt"

    wrfile = wrfolder + "/num_reg.txt";
    String str_buf = dtostrf(num_reg,2,0,m_buf);  //整数を文字列に変換

    //上記で一度 storeFLASH(); を実行すると関数内で ena_FLASH = false 書込みを禁止されるため再度許可する。
    ena_store = true; //FLASH 書込み許可
    store_FLASH( wrfile, str_buf ); //登録数カウンタ値を FLASH に書込む
    ena_assign = false; //信号登録禁止
  }

  // (22) ----------- 「リモコン送信」ボタンが押された時の処理 ------------------------------------//

  if ((ena_restore == true) && (ena_send == true)){ //FLASH 読出し許可、irSend 許可 の場合

    //登録数カウンタ num.reg の値を FLAH から読み出す
    wrfile = wrfolder + "/num_reg.txt"; //ファイル名生成 (例) wrfile = "/bt_1/num_reg.txt"
    restore_FLASH(wrfile);              //FALSH から読出し
    int count = atoi(readStr.c_str());  //for ループでカウントするために文字列を整数に変換する。

    //「リモコン送信」ボタンに何も登録されていなければ処理を終了する。
    if ( count == 0){
      ena_restore = false; //FLASH 読出し禁止
      ena_send = false;    //irSend 禁止
      status_information = "このボタンには何も登録されていません。"; //クライアント側で情報を表示する
      Serial.println(status_information); //ターミナル出力
    }
    //「リモコン送信」ボタンに登録された登録数 num_reg 回だけ FLASH から読み出して送信する。
    for (int i =1 ; i <= count; i++){ // count は FLASH から読み出した登録数を整数化したもの

      //ファイル名生成 (例) wrfile = "bt_1/bt1_1.txt"
      wrfile = wrfolder + wrfolder + "_" + i + ".txt";
      restore_FLASH(wrfile); //FLAH からリモコン信号を読み出す
      delay(100);
      send_IR_process(readStr);  //リモコン信号送信

      //ループの最後でフラグを初期化しておく
      if ( i == count ){
        ena_restore = false; //FLASH 書込み禁止
        ena_send = false;    //irSend 禁止
      }
    }
  }
}

//+++++++++++++++++++++++++++++++++++++++++++++++++++++++++++++++++++++++++++++++++++++++++++++//
// 関数定義                                                                                     //
//+++++++++++++++++++++++++++++++++++++++++++++++++++++++++++++++++++++++++++++++++++++++++++++//

// (15) ----------- receive_IR_process --------------------------------------------------------//

// PIN 33 が HIGH 出力になると、irReceive は待ち受け状態になり PIN 15 に入力があれば動作を開始する。
// リモコン信号が入力されると戻り値 writeStr を返す。

String receive_IR_process() {

  if (IrReceiver.decode()) {  // Grab an IR code
    Serial.println("\n**************************************************************");
    Serial.println("receive_IR_process started");
    Serial.println("**************************************************************");
    // At 115200 baud, printing takes 200 ms for NEC protocol and 70 ms for NEC repeat
    Serial.println(); // blank line between entries
    Serial.println(); // 2 blank lines between entries
    IrReceiver.printIRResultShort(&Serial);
    // Check if the buffer overflowed
    if (IrReceiver.decodedIRData.flags & IRDATA_FLAGS_WAS_OVERFLOW) {
      Serial.println(F("Try to increase the \"RAW_BUFFER_LENGTH\" value of " STR(RAW_BUFFER_LENGTH) " in " __FILE__));
      // see also https://github.com/Arduino-IRremote/Arduino-IRremote#compile-options--macros-for-this-library
    } else {
      if (IrReceiver.decodedIRData.protocol == UNKNOWN) {
        Serial.println(F("Received noise or an unknown (or not yet enabled) protocol"));
      }
      Serial.println();
      IrReceiver.printIRSendUsage(&Serial);
      Serial.println();
      Serial.println(F("Raw result in internal ticks (50 us) - with leading gap"));
      IrReceiver.printIRResultRawFormatted(&Serial, false); // Output the results in RAW format
      Serial.println(F("Raw result in microseconds - with leading gap"));
      IrReceiver.printIRResultRawFormatted(&Serial, true);  // Output the results in RAW format
      Serial.println();                               // blank line between entries
      Serial.print(F("Result as internal 8bit ticks (50 us) array - compensated with MARK_EXCESS_MICROS="));
      Serial.println(MARK_EXCESS_MICROS);
      IrReceiver.compensateAndPrintIRResultAsCArray(&Serial, false); // Output the results as uint8_t source code array of ticks
      Serial.print(F("Result as microseconds array - compensated with MARK_EXCESS_MICROS="));
      Serial.println(MARK_EXCESS_MICROS);
      IrReceiver.compensateAndPrintIRResultAsCArray(&Serial, true); // Output the results as uint16_t source code array of micros
      IrReceiver.printIRResultAsCVariables(&Serial);  // Output address and data as source code variables
      Serial.println();                               // blank line between entries

      IrReceiver.compensateAndPrintIRResultAsPronto(&Serial);

      /*
        * Example for using the compensateAndStorePronto() function.
        * Creating this String requires 2210 bytes program memory and 10 bytes RAM for the String class.
        * The String object itself requires additional 440 bytes RAM from the heap.
        * This values are for an Arduino Uno.
      */
      Serial.println();                                     // blank line between entries
      String ProntoHEX = F("");                             // Assign string to ProtoHex string object
//        String ProntoHEX = F("Pronto HEX contains: ");        // Assign string to ProtoHex string object
      if (int size = IrReceiver.compensateAndStorePronto(&ProntoHEX)) {   // Dump the content of the IReceiver Pronto HEX to the String object
//            // Append compensateAndStorePronto() size information to the String object (requires 50 bytes heap)
//            ProntoHEX += F("\r\nProntoHEX is ");              // Add codes size information to the String object
//            ProntoHEX += size;
//            ProntoHEX += F(" characters long and contains "); // Add codes count information to the String object
//            ProntoHEX += size / 5;
//            ProntoHEX += F(" codes");
//            Serial.println(ProntoHEX.c_str());                // Print to the serial console the whole String object

        //----------- FLASH に書込むために以下を追加した ----------//
        writeStr = ProntoHEX.c_str();  //FLASH に書込むデータはグロ-バル変数 writeStr を使用する
        Serial.print("writeStr.length = ");
        Serial.println(writeStr.length()); //文字列の長さを出力する
        //ターミナルにメッセージ出力
        Serial.println("**************************************************************");
        Serial.println("receive_IR_process finishd");
        Serial.println("**************************************************************");

        Serial.println();                                 // blank line between entries
      }
   }
    IrReceiver.resume();                            // Prepare for the next IR frame
    delay(200);
    String str_buf = dtostrf(writeStr.length(), 5, 0, m_buf); //文字列 writeStr の長さを抽出して文字列に変換する
    //クライアント側で情報を表示する
    status_information = "取込んだリモコン信号の長さは、" + str_buf + " バイトです。\nこの内容でよければ、「登録」ボタンを押してください。\nやり直すには、リモコン送信機のボタンをもう一度押してください。";
  }
  return writeStr;
}

// (23) ----------- send_IR_process -----------------------------------------------------------//

void send_IR_process( String readStr ){ //FALSH から読み出したときの戻り値が readStr
  delay(200); //FLASH 書込み直後に読み出された場合を想定して遅延を設けている。
  if ( ena_send == true ){ //irSend 許可の場合
    //ターミナルにメッセージ出力
    Serial.println("\n**************************************************************");
    Serial.println("send_IR_process started");
    Serial.println("**************************************************************");
    //リモコン信号を送信する
    IrSender.sendPronto(readStr.c_str());
     //ターミナルにメッセージ出力
    Serial.println("readStr.c_str() = ");
    Serial.println(readStr.c_str());
    Serial.println("send trun on at " + String(millis()));
    Serial.println("**************************************************************");
    Serial.println("send_IR_process finished");
    Serial.println("**************************************************************");
  }
}

// (34) ----------- 初期化処理 -----------------------------------------------------------------//
// SPI 速度と端子の初期化
void doInitialize() {
  Serial.begin(SPI_SPEED);
  /*
  pinMode(ledPin, OUTPUT);           // GPIO設定:LED
  digitalWrite(ledPin, LOW);
  ledState = CST_OFF;
  */
}

// (35) ----------- Wi-Fi 接続処理 ------------------------------------------------------------//
// Wi-Fiルーターに接続する
void connectToWifi() {
  Serial.print("Connecting to Wi-Fi ");
  WiFi.begin(WIFI_SSID, WIFI_PASSWORD);
  while (WiFi.status() != WL_CONNECTED) {
    delay(500);
    Serial.print(".");
  }
  Serial.println("");
  //モニターにローカル IPアドレスを表示する
  Serial.println("WiFi connected.");
  Serial.print("  *IP address: ");
  Serial.println(WiFi.localIP());
  server.begin();
}

// (36) ーーーーーーーーー-- プレースホルダー処理 ---------------------------------------------------------//
String editPlaceHolder(const String& var) {
  if (var == "CURTIME") {
    return getCurTime();
  }
  else if (var == "MSG_INFORMATION"){
    return getMsg_information();
  }
}

// (38) ----------- 現在の日時を取得する --------------------------------------------------------//
String getCurTime() {
  struct tm timeinfo;
  char buf[64];
  if(getLocalTime(&timeinfo)) {
    sprintf(buf,"%04d/%02d/%02d %02d:%02d:%02d",
    timeinfo.tm_year+1900, timeinfo.tm_mon+1, timeinfo.tm_mday,
    timeinfo.tm_hour, timeinfo.tm_min, timeinfo.tm_sec);
    return buf;
  }
}

// (39) ----------- Smart Remote Controller の状態を通知する ------------------------------------//
String getMsg_information(){
  return status_information;
}

// (44) ----------- store_FLASH ---------------------------------------------------------------//
//ファイル名( wrfile )と文字列( writeStr )を引数として FLASH に書込む。 ena_store = true で書込み許可。
void store_FLASH( String wrfile,String writeStr ){
  if ( ena_store == true ){
    //ターミナルにメッセージ出力
    Serial.println("\n**************************************************************");
    Serial.println("store_FLASH started");
    Serial.println("**************************************************************");

    File fw = SPIFFS.open(wrfile.c_str(), "w");  //ファイルを書込みモードで開く
    fw.println(writeStr);  //ファイルに書込み
    fw.close();  //ファイルを閉じる

    //ターミナルにメッセージ出力
    Serial.print("wrfile = ");
    Serial.println(wrfile);
    Serial.print("writeStr= ");
    Serial.println(writeStr);
    delay (1000);
    Serial.println("**************************************************************");
    Serial.println("store_FLASH finished");
    Serial.println("**************************************************************");
    //書込みフラグを初期化して禁止する。
    ena_store = false;
  }
}

// (45) ----------- restore_FLASH -------------------------------------------------------------//
//ファイル名( wrfile )を引数として FLASH から読出し readStr を返す。 ena_restore = true 読出し許可。
String restore_FLASH( String wrfile ){
  if ( ena_restore == true ){
    //ターミナルにメッセージ出力
    Serial.println("\n**************************************************************");
    Serial.println("restore_FLASH started");
    Serial.println("**************************************************************");

    File fr = SPIFFS.open(wrfile.c_str(),"r"); //ファイルを読込みモードで開く
    readStr = fr.readStringUntil('\n'); //改行まで1行読み出し
    fr.close(); //ファイルを閉じる

    //ターミナルにメッセージ出力
    Serial.print("readStr = \n");
    Serial.println(readStr);
    delay(200);
    Serial.print("readStr.length = ");
    Serial.println(readStr.length());
    Serial.println("**************************************************************");
    Serial.println("restore_FLASH finished");
    Serial.println("**************************************************************");
  }
  return readStr;
}

// (54) ----------- bt_response ボタンレスポンス ------------------------------------------------//
// リモコン送信ボタンに表示するラベル( bt_label ) とボタン名 ( bt_name ) を引数とするボタン動作
void bt_response(String bt_label, String bt_name){
  wrfolder = "/bt_" + bt_label; //フォルダ名生成(bt_label の値は 1-16)
  wrfile = "/bt_" + bt_label;   //ファイル名生成

  //ボタンに登録するときの処理
  if (ena_store == true){     //「取込」、「登録」に続けて「リモコン送信」ボタンを押した場合、
    if ( bt_id != bt_label){ //複数「登録」で異なる「リモコン送信」ボタンを押した場合、
      num_reg = 1;            //リモコン送信ボタンに登録するリモコン信号の数を 1 に戻しておく。
    }
    ena_assign = true;        //信号登録許可
    delay(1000);              //FLASH 書込みを待ってから次の処理へ進める。
    String str_buf = dtostrf(num_reg,2,0,m_buf);  //整数を文字列に変換
    //クライアント側で情報を表示する
    status_information = bt_name + " ボタンに"+ str_buf + " つめのリモコン信号を「登録」しました。";
    //複数登録中にリモコン送信ボタンが変更されたか識別用 bt_id に bt_label (1-16) を初期値として設定する。
    bt_id = bt_label;
  }
    //「リモコン送信」ボタンのみを押したときの処理。
  else if ((ena_store == false)){
    ena_restore = true;  //FLASH 読出しを許可
    ena_send = true;     //irSend リモコン信号送信を許可
    //クライアント側で情報を表示する
    status_information = bt_name + " リモコン信号を送信しました。";
  }
}
図9 main.cpp に使うコード
main.cpp にコードをペーストした結果です。(図10)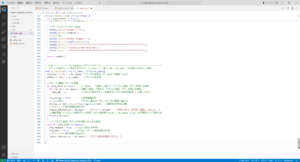
*図10 main.cpp にコードをペーストした
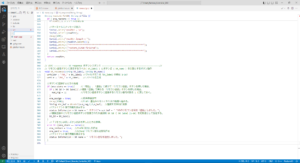
*図11 >src フォルダ下に新しいファイルを作る
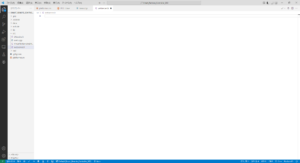
*図12 >src フォルダー下に3つの空ファイルを作った
// (12) ----------- irReceive に必要な定義 -----------------------------------------------------//
//                                                                                             //
//                                                                                             //
//      PinDefinitionAndMore.h  #define IR_RECEIVE_PIN 15 // D15                               //
//      リモコン受光ICからの信号入力許可、禁止を制御する。 HIGH=許可、LOW=禁止                      //
//                                                                                             //
// --------------------------------------------------------------------------------------------//
/*
 * ReceiveDump.cpp
 *
 * Dumps the received signal in different flavors.
 * Since the printing takes so much time (200 ms @115200 for NEC protocol, 70ms for NEC repeat),
 * repeat signals may be skipped or interpreted as UNKNOWN.
 *
 *  This file is part of Arduino-IRremote https://github.com/Arduino-IRremote/Arduino-IRremote.
 *
 ************************************************************************************
 * MIT License
 *
 * Copyright (c) 2020-2024 Armin Joachimsmeyer
 *
 * Permission is hereby granted, free of charge, to any person obtaining a copy
 * of this software and associated documentation files (the "Software"), to deal
 * in the Software without restriction, including without limitation the rights
 * to use, copy, modify, merge, publish, distribute, sublicense, and/or sell
 * copies of the Software, and to permit persons to whom the Software is furnished
 * to do so, subject to the following conditions:
 *
 * The above copyright notice and this permission notice shall be included in all
 * copies or substantial portions of the Software.
 *
 * THE SOFTWARE IS PROVIDED "AS IS", WITHOUT WARRANTY OF ANY KIND, EXPRESS OR IMPLIED,
 * INCLUDING BUT NOT LIMITED TO THE WARRANTIES OF MERCHANTABILITY, FITNESS FOR A
 * PARTICULAR PURPOSE AND NONINFRINGEMENT. IN NO EVENT SHALL THE AUTHORS OR COPYRIGHT
 * HOLDERS BE LIABLE FOR ANY CLAIM, DAMAGES OR OTHER LIABILITY, WHETHER IN AN ACTION OF
 * CONTRACT, TORT OR OTHERWISE, ARISING FROM, OUT OF OR IN CONNECTION WITH THE SOFTWARE
 * OR THE USE OR OTHER DEALINGS IN THE SOFTWARE.
 *
 ************************************************************************************
 */
//#include <Arduino.h>

#include "PinDefinitionsAndMore.h" // Define macros for input and output pin etc.

#if !defined(RAW_BUFFER_LENGTH)
// For air condition remotes it requires 750. Default is 200.
#  if !((defined(RAMEND) && RAMEND <= 0x4FF) || (defined(RAMSIZE) && RAMSIZE < 0x4FF))
#define RAW_BUFFER_LENGTH  730 // this allows usage of 16 bit raw buffer, for RECORD_GAP_MICROS > 20000
#  endif
#endif

/*
 * MARK_EXCESS_MICROS is subtracted from all marks and added to all spaces before decoding,
 * to compensate for the signal forming of different IR receiver modules. See also IRremote.hpp line 142.
 *
 * You can change this value accordingly to the receiver module you use.
 * The required value can be derived from the timings printed here.
 * Keep in mind that the timings may change with the distance
 * between sender and receiver as well as with the ambient light intensity.
 */
#define MARK_EXCESS_MICROS    20    // Adapt it to your IR receiver module. 20 is recommended for the cheap VS1838 modules.

//#define RECORD_GAP_MICROS 12000 // Default is 8000. Activate it for some LG air conditioner protocols
//#define DEBUG // Activate this for lots of lovely debug output from the decoders.
#define LED_BUILTIN 26
#define RAW_BUFFER_LENGTH 750
#define RECORD_GAP_MICROS 12000

#include <IRremote.hpp>

// プロトタイプ宣言
String receive_IR_process();
図13 irReceive.h
irReceicve.h にコードをペーストした結果です。(図14)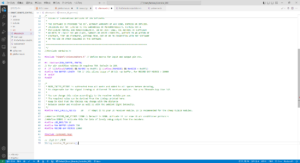
*図14 irReceive.h にペーストした結果
/*
* PinDefinitionsAndMore.h
*
* Contains pin definitions for IRremote examples for various platforms
* as well as definitions for feedback LED and tone() and includes
*
* Copyright (C) 2021-2023 Armin Joachimsmeyer
* armin.joachimsmeyer@gmail.com
*
* This file is part of IRremote https://github.com/Arduino-IRremote/Arduino-IRremote.
*
* Arduino-IRremote is free software: you can redistribute it and/or modify
* it under the terms of the GNU General Public License as published by
* the Free Software Foundation, either version 3 of the License, or
* (at your option) any later version.
*
* This program is distributed in the hope that it will be useful,
* but WITHOUT ANY WARRANTY; without even the implied warranty of
* MERCHANTABILITY or FITNESS FOR A PARTICULAR PURPOSE.
* See the GNU General Public License for more details.
*
* You should have received a copy of the GNU General Public License
* along with this program. If not, see <http://www.gnu.org/licenses/gpl.html>.
*
*/
/*
* Pin mapping table for different platforms
*
* Platform IR input IR output Tone Core/Pin schema
* --------------------------------------------------------------
* DEFAULT/AVR 2 3 4 Arduino
* ATtinyX5 0|PB0 4|PB4 3|PB3 ATTinyCore
* ATtiny167 3|PA3 2|PA2 7|PA7 ATTinyCore
* ATtiny167 9|PA3 8|PA2 5|PA7 Digispark original core
* ATtiny84 |PB2 |PA4 |PA3 ATTinyCore
* ATtiny88 3|PD3 4|PD4 9|PB1 ATTinyCore
* ATtiny3217 18|PA1 19|PA2 20|PA3 MegaTinyCore
* ATtiny1604 2 3|PA5 %
* ATtiny816 14|PA1 16|PA3 1|PA5 MegaTinyCore
* ATtiny1614 8|PA1 10|PA3 1|PA5 MegaTinyCore
* SAMD21 3 4 5
* ESP8266 14|D5 12|D6 %
* ESP32 15 4 27
* ESP32-C3 6 7 10
* BluePill PA6 PA7 PA3
* APOLLO3 11 12 5
* RP2040 3|GPIO15 4|GPIO16 5|GPIO17
*/
//#define _IR_MEASURE_TIMING // For debugging purposes.
#if defined(__AVR__)
#if defined(__AVR_ATtiny25__) || defined(__AVR_ATtiny45__) || defined(__AVR_ATtiny85__) // Digispark board. For use with ATTinyCore.
#include "ATtinySerialOut.hpp" // TX is at pin 2 - Available as Arduino library "ATtinySerialOut". Saves 700 bytes program memory and 70 bytes RAM for ATtinyCore.
#define IR_RECEIVE_PIN PIN_PB0
#define IR_SEND_PIN PIN_PB4 // Pin 2 is serial output with ATtinySerialOut. Pin 1 is internal LED and Pin3 is USB+ with pullup on Digispark board.
#define TONE_PIN PIN_PB3
#define _IR_TIMING_TEST_PIN PIN_PB3
# elif defined(__AVR_ATtiny87__) || defined(__AVR_ATtiny167__) // Digispark pro board
#include "ATtinySerialOut.hpp" // Available as Arduino library "ATtinySerialOut"
// For ATtiny167 Pins PB6 and PA3 are usable as interrupt source.
# if defined(ARDUINO_AVR_DIGISPARKPRO)
// For use with Digispark original core
#define IR_RECEIVE_PIN 9 // PA3 - on Digispark board labeled as pin 9
//#define IR_RECEIVE_PIN 14 // PB6 / INT0 is connected to USB+ on DigisparkPro boards
#define IR_SEND_PIN 8 // PA2 - on Digispark board labeled as pin 8
#define TONE_PIN 5 // PA7 - on Digispark board labeled as pin 5
#define _IR_TIMING_TEST_PIN 10 // PA4
# else
// For use with ATTinyCore
#define IR_RECEIVE_PIN PIN_PA3 // On Digispark board labeled as pin 9 - INT0 is connected to USB+ on DigisparkPro boards
#define IR_SEND_PIN PIN_PA2 // On Digispark board labeled as pin 8
#define TONE_PIN PIN_PA7 // On Digispark board labeled as pin 5
# endif
# elif defined(__AVR_ATtiny84__) // For use with ATTinyCore
#include "ATtinySerialOut.hpp" // Available as Arduino library "ATtinySerialOut". Saves 128 bytes program memory.
#define IR_RECEIVE_PIN PIN_PB2 // INT0
#define IR_SEND_PIN PIN_PA4
#define TONE_PIN PIN_PA3
#define _IR_TIMING_TEST_PIN PIN_PA5
# elif defined(__AVR_ATtiny88__) // MH-ET Tiny88 board. For use with ATTinyCore.
#include "ATtinySerialOut.hpp" // Available as Arduino library "ATtinySerialOut". Saves 128 bytes program memory.
// Pin 6 is TX, pin 7 is RX
#define IR_RECEIVE_PIN PIN_PD3 // 3 - INT1
#define IR_SEND_PIN PIN_PD4 // 4
#define TONE_PIN PIN_PB1 // 9
#define _IR_TIMING_TEST_PIN PIN_PB0 // 8
# elif defined(__AVR_ATtiny1616__) || defined(__AVR_ATtiny3216__) || defined(__AVR_ATtiny3217__) // For use with megaTinyCore
// Tiny Core Dev board
// https://www.tindie.com/products/xkimi/tiny-core-16-dev-board-attiny1616/ - Out of Stock
// https://www.tindie.com/products/xkimi/tiny-core-32-dev-board-attiny3217/ - Out of Stock
#define IR_RECEIVE_PIN PIN_PA1 // use 18 instead of PIN_PA1 for TinyCore32
#define IR_SEND_PIN PIN_PA2 // 19
#define TONE_PIN PIN_PA3 // 20
#define APPLICATION_PIN PIN_PA0 // 0
#undef LED_BUILTIN // No LED available on the TinyCore 32 board, take the one on the programming board which is connected to the DAC output
#define LED_BUILTIN PIN_PA6 // use 2 instead of PIN_PA6 for TinyCore32
# elif defined(__AVR_ATtiny816__) // For use with megaTinyCore
#define IR_RECEIVE_PIN PIN_PA1 // 14
#define IR_SEND_PIN PIN_PA1 // 16
#define TONE_PIN PIN_PA5 // 1
#define APPLICATION_PIN PIN_PA4 // 0
#undef LED_BUILTIN // No LED available, take the one which is connected to the DAC output
#define LED_BUILTIN PIN_PB5 // 4
# elif defined(__AVR_ATtiny1614__) // For use with megaTinyCore
#define IR_RECEIVE_PIN PIN_PA1 // 8
#define IR_SEND_PIN PIN_PA3 // 10
#define TONE_PIN PIN_PA5 // 1
#define APPLICATION_PIN PIN_PA4 // 0
# elif defined(__AVR_ATtiny1604__) // For use with megaTinyCore
#define IR_RECEIVE_PIN PIN_PA6 // 2 - To be compatible with interrupt example, pin 2 is chosen here.
#define IR_SEND_PIN PIN_PA7 // 3
#define APPLICATION_PIN PIN_PB2 // 5
#define tone(...) void() // Define as void, since TCB0_INT_vect is also used by tone()
#define noTone(a) void()
#define TONE_PIN 42 // Dummy for examples using it
# elif defined(__AVR_ATmega1284__) || defined(__AVR_ATmega1284P__) \
|| defined(__AVR_ATmega644__) || defined(__AVR_ATmega644P__) \
|| defined(__AVR_ATmega324P__) || defined(__AVR_ATmega324A__) \
|| defined(__AVR_ATmega324PA__) || defined(__AVR_ATmega164A__) \
|| defined(__AVR_ATmega164P__) || defined(__AVR_ATmega32__) \
|| defined(__AVR_ATmega16__) || defined(__AVR_ATmega8535__) \
|| defined(__AVR_ATmega64__) || defined(__AVR_ATmega128__) \
|| defined(__AVR_ATmega1281__) || defined(__AVR_ATmega2561__) \
|| defined(__AVR_ATmega8515__) || defined(__AVR_ATmega162__)
#define IR_RECEIVE_PIN 2
#define IR_SEND_PIN 13
#define TONE_PIN 4
#define APPLICATION_PIN 5
#define ALTERNATIVE_IR_FEEDBACK_LED_PIN 6 // E.g. used for examples which use LED_BUILDIN for example output.
#define _IR_TIMING_TEST_PIN 7
# else // Default as for ATmega328 like on Uno, Nano, Leonardo, Teensy 2.0 etc.
#define IR_RECEIVE_PIN 2 // To be compatible with interrupt example, pin 2 is chosen here.
#define IR_SEND_PIN 3
#define TONE_PIN 4
#define APPLICATION_PIN 5
#define ALTERNATIVE_IR_FEEDBACK_LED_PIN 6 // E.g. used for examples which use LED_BUILDIN for example output.
#define _IR_TIMING_TEST_PIN 7
# if defined(ARDUINO_AVR_PROMICRO) // Sparkfun Pro Micro is __AVR_ATmega32U4__ but has different external circuit
// We have no built in LED at pin 13 -> reuse RX LED
#undef LED_BUILTIN
#define LED_BUILTIN LED_BUILTIN_RX
# endif
# endif // defined(__AVR_ATtiny25__)...
#elif defined(ARDUINO_ARCH_RENESAS_UNO) // Uno R4
// To be compatible with Uno R3.
#define IR_RECEIVE_PIN 2
#define IR_SEND_PIN 3
#define TONE_PIN 4
#define APPLICATION_PIN 5
#define ALTERNATIVE_IR_FEEDBACK_LED_PIN 6 // E.g. used for examples which use LED_BUILDIN for example output.
#define _IR_TIMING_TEST_PIN 7
#elif defined(ESP8266)
#define FEEDBACK_LED_IS_ACTIVE_LOW // The LED on my board (D4) is active LOW
#define IR_RECEIVE_PIN 14 // D5
#define IR_SEND_PIN 12 // D6 - D4/pin 2 is internal LED
#define _IR_TIMING_TEST_PIN 2 // D4
#define APPLICATION_PIN 13 // D7
#define tone(...) void() // tone() inhibits receive timer
#define noTone(a) void()
#define TONE_PIN 42 // Dummy for examples using it
#elif defined(CONFIG_IDF_TARGET_ESP32C3) || defined(ARDUINO_ESP32C3_DEV)
#define NO_LED_FEEDBACK_CODE // The WS2812 on pin 8 of AI-C3 board crashes if used as receive feedback LED, other I/O pins are working...
#define IR_RECEIVE_PIN 6
#define IR_SEND_PIN 7
#define TONE_PIN 10
#define APPLICATION_PIN 18
#elif defined(ESP32)
#include <Arduino.h>
// tone() is included in ESP32 core since 2.0.2
#if !defined(ESP_ARDUINO_VERSION_VAL)
#define ESP_ARDUINO_VERSION_VAL(major, minor, patch) 12345678
#endif
#if ESP_ARDUINO_VERSION <= ESP_ARDUINO_VERSION_VAL(2, 0, 2)
#define TONE_LEDC_CHANNEL 1 // Using channel 1 makes tone() independent of receiving timer -> No need to stop receiving timer.
void tone(uint8_t aPinNumber, unsigned int aFrequency){
ledcAttachPin(aPinNumber, TONE_LEDC_CHANNEL);
ledcWriteTone(TONE_LEDC_CHANNEL, aFrequency);
}
void tone(uint8_t aPinNumber, unsigned int aFrequency, unsigned long aDuration){
ledcAttachPin(aPinNumber, TONE_LEDC_CHANNEL);
ledcWriteTone(TONE_LEDC_CHANNEL, aFrequency);
delay(aDuration);
ledcWriteTone(TONE_LEDC_CHANNEL, 0);
}
void noTone(uint8_t aPinNumber){
ledcWriteTone(TONE_LEDC_CHANNEL, 0);
}
#endif // ESP_ARDUINO_VERSION <= ESP_ARDUINO_VERSION_VAL(2, 0, 2)
#define IR_RECEIVE_PIN 15 // D15
#define IR_SEND_PIN 4 // D4
#define TONE_PIN 27 // D27 25 & 26 are DAC0 and 1
#define APPLICATION_PIN 16 // RX2 pin
#elif defined(ARDUINO_ARCH_STM32) || defined(ARDUINO_ARCH_STM32F1) // BluePill
// Timer 3 blocks PA6, PA7, PB0, PB1 for use by Servo or tone()
#define IR_RECEIVE_PIN PA6
#define IR_RECEIVE_PIN_STRING "PA6"
#define IR_SEND_PIN PA7
#define IR_SEND_PIN_STRING "PA7"
#define TONE_PIN PA3
#define _IR_TIMING_TEST_PIN PA5
#define APPLICATION_PIN PA2
#define APPLICATION_PIN_STRING "PA2"
# if defined(ARDUINO_GENERIC_STM32F103C) || defined(ARDUINO_BLUEPILL_F103C8)
// BluePill LED is active low
#define FEEDBACK_LED_IS_ACTIVE_LOW
# endif
#elif defined(ARDUINO_ARCH_APOLLO3) // Sparkfun Apollo boards
#define IR_RECEIVE_PIN 11
#define IR_SEND_PIN 12
#define TONE_PIN 5
#elif defined(ARDUINO_ARCH_MBED) && defined(ARDUINO_ARCH_MBED_NANO) // Arduino Nano 33 BLE and Arduino Nano Connect layout for MBED
// Must be before ARDUINO_ARCH_RP2040, since it is the layout for the MBED core of Arduino Nano Connect
#define IR_RECEIVE_PIN 3 // GPIO15 Start with pin 3 since pin 2|GPIO25 is connected to LED on Pi pico
#define IR_SEND_PIN 4 // GPIO16
#define TONE_PIN 5
#define APPLICATION_PIN 6
#define ALTERNATIVE_IR_FEEDBACK_LED_PIN 7 // E.g. used for examples which use LED_BUILDIN for example output.
#define _IR_TIMING_TEST_PIN 8
#elif defined(ARDUINO_ARCH_RP2040) // Arduino Nano Connect, Pi Pico with arduino-pico core https://github.com/earlephilhower/arduino-pico
#define IR_RECEIVE_PIN 15 // GPIO15 to be compatible with the Arduino Nano RP2040 Connect (pin3)
#define IR_SEND_PIN 16 // GPIO16
#define TONE_PIN 17
#define APPLICATION_PIN 18
#define ALTERNATIVE_IR_FEEDBACK_LED_PIN 19 // E.g. used for examples which use LED_BUILDIN for example output.
#define _IR_TIMING_TEST_PIN 20
// If you program the Nano RP2040 Connect with this core, then you must redefine LED_BUILTIN
// and use the external reset with 1 kOhm to ground to enter UF2 mode
#undef LED_BUILTIN
#define LED_BUILTIN 6
#elif defined(PARTICLE) // !!!UNTESTED!!!
#define IR_RECEIVE_PIN A4
#define IR_SEND_PIN A5 // Particle supports multiple pins
#define LED_BUILTIN D7
/*
* 4 times the same (default) layout for easy adaption in the future
*/
#elif defined(TEENSYDUINO) // Teensy 2.0 is handled at default for ATmega328 like on Uno, Nano, Leonardo etc.
#define IR_RECEIVE_PIN 2
#define IR_SEND_PIN 3
#define TONE_PIN 4
#define APPLICATION_PIN 5
#define ALTERNATIVE_IR_FEEDBACK_LED_PIN 6 // E.g. used for examples which use LED_BUILDIN for example output.
#define _IR_TIMING_TEST_PIN 7
#elif defined(ARDUINO_ARCH_MBED) // Arduino Nano 33 BLE
#define IR_RECEIVE_PIN 2
#define IR_SEND_PIN 3
#define TONE_PIN 4
#define APPLICATION_PIN 5
#define ALTERNATIVE_IR_FEEDBACK_LED_PIN 6 // E.g. used for examples which use LED_BUILDIN for example output.
#define _IR_TIMING_TEST_PIN 7
#elif defined(ARDUINO_ARCH_SAMD) || defined(ARDUINO_ARCH_SAM)
#define IR_RECEIVE_PIN 2
#define IR_SEND_PIN 3
#define TONE_PIN 4
#define APPLICATION_PIN 5
#define ALTERNATIVE_IR_FEEDBACK_LED_PIN 6 // E.g. used for examples which use LED_BUILDIN for example output.
#define _IR_TIMING_TEST_PIN 7
#if !defined(ARDUINO_SAMD_ADAFRUIT) && !defined(ARDUINO_SEEED_XIAO_M0)
// On the Zero and others we switch explicitly to SerialUSB
#define Serial SerialUSB
#endif
// Definitions for the Chinese SAMD21 M0-Mini clone, which has no led connected to D13/PA17.
// Attention!!! D2 and D4 are swapped on these boards!!!
// If you connect the LED, it is on pin 24/PB11. In this case activate the next two lines.
//#undef LED_BUILTIN
//#define LED_BUILTIN 24 // PB11
// As an alternative you can choose pin 25, it is the RX-LED pin (PB03), but active low.In this case activate the next 3 lines.
//#undef LED_BUILTIN
//#define LED_BUILTIN 25 // PB03
//#define FEEDBACK_LED_IS_ACTIVE_LOW // The RX LED on the M0-Mini is active LOW
#elif defined (NRF51) // BBC micro:bit
#define IR_RECEIVE_PIN 2
#define IR_SEND_PIN 3
#define APPLICATION_PIN 1
#define _IR_TIMING_TEST_PIN 4
#define tone(...) void() // no tone() available
#define noTone(a) void()
#define TONE_PIN 42 // Dummy for examples using it
#else
#warning Board / CPU is not detected using pre-processor symbols -> using default values, which may not fit. Please extend PinDefinitionsAndMore.h.
// Default valued for unidentified boards
#define IR_RECEIVE_PIN 2
#define IR_SEND_PIN 3
#define TONE_PIN 4
#define APPLICATION_PIN 5
#define ALTERNATIVE_IR_FEEDBACK_LED_PIN 6 // E.g. used for examples which use LED_BUILDIN for example output.
#define _IR_TIMING_TEST_PIN 7
#endif // defined(ESP8266)
#if defined(ESP32) || defined(ARDUINO_ARCH_RP2040) || defined(PARTICLE) || defined(ARDUINO_ARCH_MBED)
#define SEND_PWM_BY_TIMER // We do not have pin restrictions for this CPU's, so lets use the hardware PWM for send carrier signal generation
#else
# if defined(SEND_PWM_BY_TIMER)
#undef IR_SEND_PIN // SendPin is determined by timer! This avoids warnings in IRremote.hpp and IRTimer.hpp
# endif
#endif
#if !defined (FLASHEND)
#define FLASHEND 0xFFFF // Dummy value for platforms where FLASHEND is not defined
#endif
/*
* Helper macro for getting a macro definition as string
*/
#if !defined(STR_HELPER)
#define STR_HELPER(x) #x
#define STR(x) STR_HELPER(x)
#endif
図15 PinDefinitionsAndMore.h
PinDefinitionsAndMore.h にコードをペーストした結果です。(図16)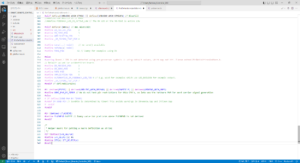
*図16 PinDefinitionsAndMore.h にペーストした結果
// (32) ----------- webserver に必要な定義 -----------------------------------------------------//

#include <AsyncEventSource.h>
#include <AsyncWebSocket.h>
#include <AsyncWebSynchronization.h>
#include <ESPAsyncWebServer.h>
#include <SPIFFSEditor.h>
#include <StringArray.h>
#include <WebAuthentication.h>
#include <WebHandlerImpl.h>
#include <WebResponseImpl.h>
#include <HTTPUpdate.h>
#include <SPIFFS.h>
#include <WiFi.h>
#include <ESPAsyncWebServer.h>

// プロトタイプ宣言
void doInitialize();
void connectToWifi();
String editPlaceHolder(const String&);
String getMessage();
String getCurTime();
String getMsg_information();
void webpage_setup();

// ルーター接続情報
#define WIFI_SSID "XXXXXXXX"
#define WIFI_PASSWORD "YYYYYYYY"

// NTPサーバー時刻設定用
const char* ntpServer = "pool.ntp.org";
const int   gmtOffset_sec = 9 * 3600;

// 基本パラメータ定義
#define SPI_SPEED   115200
#define CST_ON      "ON"
#define CST_OFF     "OFF"

// Webサーバーオブジェクト
#define HTTP_PORT 80
AsyncWebServer server(HTTP_PORT);

// LED ピン定義
// Smart Remote Controller の機能には無関係だが動作確認用に残している。
const int ledPin = 25;              // LED出力接続ピン
String ledState = "OFF";            // 出力ピンの状態
図17 webserver.h
SSID “xxxxxxxx” と PASSWORD “yyyyyyyy” は Wi-Fi ルーターに合わせて変更します。 webserver.h にコードをペーストした結果です。(図18)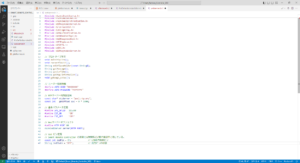
*図18 webserver.h にペーストした結果
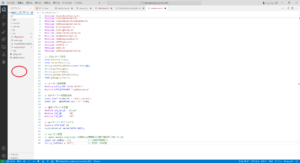
*図19 新しいフォルダー
*図20 新しいフォルダー「data」
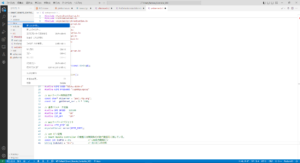
*図21 >data フォルダ下に新しいファイルを作る
*図22 >data フォルダ下に 3 つの空ファイルを作る
<!-- 20241209 Ver.303-->
<!DOCTYPE HTML>
<html>
  <head>
    <meta charset="utf-8">
    <meta name="viewport" content="width=device-width, initial-scale=1">
    <style>p{ text-align:center; }</style>
    <link rel="stylesheet" href="./style.css">
    <script src="js.js"></script>
  </head>
  <body>
    <!-- 内部変数を使用してサーバーで取得した現在時刻をクライアント画面に表示する -->
    <p><td><span id="curtime" class="value">%CURTIME%</span></td></tr></p>
    <!-- 内部変数を使用してサーバーで作成した文字列をクライアント画面に表示する -->
    <p id="msg_information" class="value">%MSG_INFORMATION%</p>

    <!-- グループ名ラベルとボタン群の定義 -->
    <p>TV</p>
    <div class="inline_1">
      <button class='bt_1' onclick='bt_1Clicked(this)' id='bt_1'>電源</button>
      <button class='bt_2' onclick='bt_2Clicked(this)' id='bt_2'>入力</button>
      <button class='bt_3' onclick='bt_3Clicked(this)' id='bt_3'>消音</button>
      <button class='bt_4' onclick='bt_4Clicked(this)' id='bt_4'></button>
    </div>
    <br>
    <div class="inline_2">
      <button class='bt_5' onclick='bt_5Clicked(this)' id='bt_5'>CH+</button>
      <button class='bt_6' onclick='bt_6Clicked(this)' id='bt_6'>地上</button>
      <button class='bt_7' onclick='bt_7Clicked(this)' id='bt_7'>Vol+</button>
      <button class='bt_8' onclick='bt_8Clicked(this)' id='bt_8'></button>
    </div>
    <br>
    <div class="inline_3">
      <button class='bt_9' onclick='bt_9Clicked(this)' id='bt_9'>CHー</button>
      <button class='bt_10' onclick='bt_10Clicked(this)' id='bt_10'>BS</button>
      <button class='bt_11' onclick='bt_11Clicked(this)' id='bt_11'>Vol-</button>
      <button class='bt_12' onclick='bt_12Clicked(this)' id='bt_12'></button>
    </div>
    <p>BOSE</p>
    <div class="inline_4">
      <button class='bt_13' onclick='bt_13Clicked(this)' id='bt_13'>On</button>
      <button class='bt_14' onclick='bt_14Clicked(this)' id='bt_14'>Off</button>
      <button class='bt_15' onclick='bt_15Clicked(this)' id='bt_15'>Vol+</button>
      <button class='bt_16' onclick='bt_16Clicked(this)' id='bt_16'>Vol-</button>
    </div>
    <br>

    <!-- ボタンを追加する場合、

    <p>ここにグループ名を入力</p>
    <div class="inline_X">
      <button class='bt_13' onclick='bt_13Clicked(this)' id='bt_13'>On</button>
      <button class='bt_14' onclick='bt_14Clicked(this)' id='bt_14'>Off</button>
      <button class='bt_15' onclick='bt_15Clicked(this)' id='bt_15'>Vol+</button>
      <button class='bt_16' onclick='bt_16Clicked(this)' id='bt_16'>Vol-</button>
    </div>

    -->
    <!-- モード切換ボタンの定義( ボタンの輪郭は消しているので文字だけに見える)-->
    <div class="bt_mode">
      <input type="checkbox" id="bt_mode" name="bt_mode"onclick="bt_modeClick();">
      <label id="bt_mode_label" for="bt_mode">Smart Remote Controller</label>
    </div>
    <!-- 制御ボタン群の定義 -->
    <div class="inline_c">
      <div class="bt_c1">
        <input type="checkbox" id="bt_c1" name="bt_c1"onclick="bt_c1Click();">
        <label id= "bt_c1_label" for="bt_c1">取込</label>
      </div>
      <div class="bt_c2">
        <input type="checkbox" id="bt_c2" name="bt_c2"onclick="bt_c2Click();">
        <label id= "bt_c2_label" for="bt_c2">登録</label>
      </div>
      <button class='bt_c3' onclick='bt_c3Clicked(this)' id='bt_c3'>終了</button>
      <div class="bt_c4">
        <input type="checkbox" id="bt_c4" name="bt_c4"onclick="bt_c4Click();">
        <label id= "bt_c4_label" for="bt_c4">予備</label>
      </div>
    </div>
  </body>
</html>
図23 index.html
index.html にコードをペーストした結果です。(図24)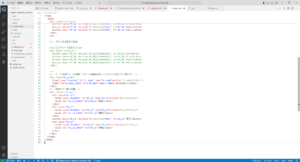
*図24 index.html にペーストした結果
/* 20241209 Ver.303
/* js.js */

/* (1)定期的に関数を実行 */
/* Server(cpp) で生成した時刻を id = curtime により共有して Client(js) で取得して表示する */
var getCurTime = function () {
    var xhr = new XMLHttpRequest();
    xhr.onreadystatechange = function() {
      if (this.readyState == 4 && this.status == 200) {
        document.getElementById("curtime").innerHTML = this.responseText;
      }
    };
    xhr.open("GET", "/curtime", true);
    xhr.send(null);
    /* モード切換ボタンの有効・無効の切換を追加した */
    control_bt_mode_status();
  }
  /* 500ms 周期で実行する */
  setInterval(getCurTime, 500);

  /* Server(cpp) の情報を id = msg_information により共有して Client(js) で取得して表示する */
  var getMsg_information = function () {
    var xhr = new XMLHttpRequest();
    xhr.onreadystatechange = function() {
      if (this.readyState == 4 && this.status == 200) {
        document.getElementById("msg_information").innerHTML = this.responseText;
      }
    };
    xhr.open("GET", "/msg_information", true);
    xhr.send(null);
  }
  /* 200ms 周期で実行 */
  setInterval(getMsg_information, 200);

  /* (2)「リモコン送信ボタン」群 */
  /* TV */
  /*「電源」ボタンを押したときの動作を記述*/
  function bt_1Clicked(element){
    if (document.getElementById('bt_c1').checked == false){
      var xhr = new XMLHttpRequest();
      xhr.open("GET", "/bt_1", true);
      xhr.send(null);
    }
  }
  /*「入力」ボタンを押したときの動作を記述*/
  function bt_2Clicked(element){
    if (document.getElementById('bt_c1').checked == false){
      var xhr = new XMLHttpRequest();
      xhr.open("GET", "/bt_2", true);
      xhr.send(null);
    }
  }
  /*「消音」ボタンを押したときの動作を記述*/
  function bt_3Clicked(element){
    if (document.getElementById('bt_c1').checked == false){
      var xhr = new XMLHttpRequest();
      xhr.open("GET", "/bt_3", true);
      xhr.send(null);
    }
  }
  /*「予備_bt_4」ボタンを押したときの動作を記述*/
  function bt_4Clicked(element){
    if (document.getElementById('bt_c1').checked == false){
      var xhr = new XMLHttpRequest();
      xhr.open("GET", "/bt_4", true);
      xhr.send(null);
    }
  }
  /*「CH+」ボタンを押したときの動作を記述*/
  function bt_5Clicked(element){
    if (document.getElementById('bt_c1').checked == false){
      var xhr = new XMLHttpRequest();
      xhr.open("GET", "/bt_5", true);
      xhr.send(null);
    }
  }
  /*「地上」ボタンを押したときの動作を記述*/
  function bt_6Clicked(element){
    if (document.getElementById('bt_c1').checked == false){
      var xhr = new XMLHttpRequest();
      xhr.open("GET", "/bt_6", true);
      xhr.send(null);
    }
  }
  /*「Vol+」ボタンを押したときの動作を記述*/
  function bt_7Clicked(element){
    if (document.getElementById('bt_c1').checked == false){
      var xhr = new XMLHttpRequest();
      xhr.open("GET", "/bt_7", true);
      xhr.send(null);
    }
  }
  /*「予備_bt_8」ボタンを押したときの動作を記述*/
  function bt_8Clicked(element){
    if (document.getElementById('bt_c1').checked == false){
      var xhr = new XMLHttpRequest();
      xhr.open("GET", "/bt_8", true);
      xhr.send(null);
    }
  }
  /*「CHー」ボタンを押したときの動作を記述*/
  function bt_9Clicked(element){
    if (document.getElementById('bt_c1').checked == false){
      var xhr = new XMLHttpRequest();
      xhr.open("GET", "/bt_9", true);
      xhr.send(null);
    }
  }
  /*「BS」ボタンを押したときの動作を記述*/
  function bt_10Clicked(element){
    if (document.getElementById('bt_c1').checked == false){
      var xhr = new XMLHttpRequest();
      xhr.open("GET", "/bt_10", true);
      xhr.send(null);
    }
  }
  /*「Vol-」ボタンを押したときの動作を記述*/
  function bt_11Clicked(element){
    if (document.getElementById('bt_c1').checked == false){
      var xhr = new XMLHttpRequest();
      xhr.open("GET", "/bt_11", true);
      xhr.send(null);
    }
  }
  /*「予備_bt_12」ボタンを押したときの動作を記述*/
  function bt_12Clicked(element){
    if (document.getElementById('bt_c1').checked == false){
      var xhr = new XMLHttpRequest();
      xhr.open("GET", "/bt_12", true);
      xhr.send(null);
    }
  }

  /* BOSE */
  /*「On」ボタン bt_13 を押したときの動作を記述*/
  function bt_13Clicked(element){
    /* bt_c1 「取込」ボタンが有効な時は bt_13 を無効にする */
    if (document.getElementById('bt_c1').checked == false){
      var xhr = new XMLHttpRequest();
      xhr.open("GET", "/bt_13", true);
      xhr.send(null);
    }
  }
  /*「Off」ボタンを押したときの動作を記述*/
  function bt_14Clicked(element){
    if (document.getElementById('bt_c1').checked == false){
      var xhr = new XMLHttpRequest();
      xhr.open("GET", "/bt_14", true);
      xhr.send(null);
    }
  }
  /*「Vol+」ボタンを押したときの動作を記述*/
  function bt_15Clicked(element){
    if (document.getElementById('bt_c1').checked == false){
      var xhr = new XMLHttpRequest();
      xhr.open("GET", "/bt_15", true);
      xhr.send(null);
    }
  }
  /*「Vol-」ボタンを押したときの動作を記述*/
  function bt_16Clicked(element){
    if (document.getElementById('bt_c1').checked == false){
      var xhr = new XMLHttpRequest();
      xhr.open("GET", "/bt_16", true);
      xhr.send(null);
    }
  }

  /* (3)モード切換ボタン */
  /* モード切換ボタンにより「取込」「登録」「終了」「予備」ボタンの有効/無効がトグルする */
  function bt_modeClick(){
    var xhr = new XMLHttpRequest();
    xhr.open("GET", "/mode", true);
    xhr.send(null);
  }

  /* (4)制御ボタン群 */
  /*「取込」ボタンを押したときの動作を記述*/
  function bt_c1Click(){
    var xhr = new XMLHttpRequest();
    xhr.open("GET", "/capture", true);
    xhr.send(null);
    const b11 = document.getElementById('bt_c1');
    const b12 = document.getElementById('bt_c2');
    b11.checked = true; /* 「取込」ボタンONを保持する */
    b12.checked = false; /* 「登録」ボタンをOFFする */
    bt_active('bt_c1_label'); /* 「取込」ボタンをアクティブ色に変更 */
    bt_standby('bt_c2_label'); /* 「登録」ボタンをスタンバイ色に変更 */
    /* 16個の「リモコン送信ボタン」をすべて禁止する */
    for (let i = 1; i < 17; i++){
      buf_btc1 = "bt_" + i ;
      disabale_button(buf_btc1);
    }
  }

  /*「登録」ボタンを押したときの動作を記述*/
  function bt_c2Click(){
    var xhr = new XMLHttpRequest();
    xhr.open("GET", "/memory", true);
    xhr.send(null);
    const b11 = document.getElementById('bt_c1');
    const b12 = document.getElementById('bt_c2');
    b11.checked = false; /* 「取込」ボタンをOFFする */
    b12.checked = true; /* 「登録」ボタンONを保持する */
    bt_standby('bt_c1_label'); /* 「取込」ボタンをスタンバイ色に変更 */
    bt_active('bt_c2_label'); /* 「登録」ボタンをアクティブ色に変更 */
    enable_all_of_TX_keys(); /* 16個の「リモコン送信ボタン」をすべて許可する */
  }

  /*「終了」ボタンを押したときの動作を記述*/
  function bt_c3Clicked(element) {
    var xhr = new XMLHttpRequest();
    xhr.open("GET", "/finish", true);
    xhr.send(null);
    const b11 = document.getElementById('bt_c1');
    const b12 = document.getElementById('bt_c2');
    b11.checked = false; /* 「取込」ボタンをOFFする */
    b12.checked = false; /* 「登録」ボタンをOFFする */
    bt_standby('bt_c1_label'); /* 「取込」ボタンをスタンバイ色に変更 */
    bt_standby('bt_c2_label'); /* 「登録」ボタンをスタンバイ色に変更 */
    enable_all_of_TX_keys(); /* 16個の「リモコン送信ボタン」をすべて許可する */
  }

  /*「予備」ボタンを押したときの動作を記述*/
  function bt_c4Click(){
    var xhr = new XMLHttpRequest();
    xhr.open("GET", "/bt_c4", true);
    xhr.send(null);
    const b14 = document.getElementById('bt_c4');
    b14.checked = true; /* 「予備」ボタンONを保持する */
  }

  /* (5)button_id で指定したボタンを無効にする */
  async function disabale_button(button_id){
    try{
      document.getElementById(button_id).setAttribute("disabled", true);
    } catch (err){
      console.error(err);
    }
  }

  /* (6)button_id で指定したボタンを有効にする */
  async function enable_button(button_id){
    try{
      document.getElementById(button_id).removeAttribute("disabled");
    } catch (err){
      console.error(err);
    }
  }

  /* (7)リモコン送信ボタン群を有効にする */
  function enable_all_of_TX_keys(){
    /* 16個の「リモコン送信ボタン」bt_1 から bt_16 を有効にする */
    for (let i = 1; i < 17; i++){
      buf_btc2 = "bt_" + i ;
      enable_button(buf_btc2);
    }
  }

  /* (8)モード切換ボタンの動作を定義する */
  /** イベントリスナで モード切換ボタンの状態を検出して制御ボタンを有効にするか、無効にするか切換える */
  function control_bt_mode_status(){
    const ev_SRC = document.getElementById('bt_mode');
    ev_SRC.addEventListener('click',
      function(event){
        enable_all_of_TX_keys();
        const btSRC = document.getElementById('bt_mode');
        if ( btSRC.checked ){ /** bt_mode が true の場合制御ボタンを有効にして画面上で見えるようにする */
          enable_button("bt_c1");
          enable_button("bt_c2");
          enable_button("bt_c3");
          enable_button("bt_c4");
          bt_standby('bt_c1_label');
          bt_standby('bt_c2_label');
          bt_standby('bt_c3');
          bt_standby('bt_c4_label');
          document.getElementById("msg_information").innerHTML = "赤外線リモコン信号取込機能が有効になりました。 ";
        } else { /** bt_mode が false の場合制御ボタンを無効にして画面上で見えなくする */
          disabale_button("bt_c1");
          disabale_button("bt_c2");
          disabale_button("bt_c3");
          disabale_button("bt_c4");
          bt_hidden('bt_c1_label');
          bt_hidden('bt_c2_label');
          bt_hidden('bt_c3');
          bt_hidden('bt_c4_label');
          document.getElementById("msg_information").innerHTML = "赤外線リモコン信号取込機能を終了しました。\n通常の赤外線リモコン送信機として機能します。";
        }
      }
    );
  }

  /* (9)状態に応じて制御ボタンの色を変更する関数 */
  /* active state */
  function bt_active(button_label_id){
    const b11L = document.getElementById(button_label_id);
    b11L.style.color = 'white';
    b11L.style.background = 'tomato';
    b11L.style.borderColor = '#627295';
  }
  /* standby state */
  function bt_standby(button_label_id){
    const b11L = document.getElementById(button_label_id);
    b11L.style.color = 'black';
    b11L.style.background = 'rgb(183,222,232)';
    b11L.style.borderColor = '#627295';
  }
  /* hidden state */
  function bt_hidden(button_label_id){
    const b11L = document.getElementById(button_label_id);
    b11L.style.color = 'aliceblue';
    b11L.style.background = 'aliceblue';
    b11L.style.borderColor = 'aliceblue';
  }
図25 js.js
js.js にコードをペーストした結果です。(図26)*図26 js.js にペーストした結果
/* 20241209 Ver.303
/* sstyle.css       */

@charset "utf-8";

/* 画面サイズが1080px以下の場合、この記述が適用される */
@media screen and (max-width:1080px){ main{ width: 100%; } }

html { font-family: Helvetica; display: inline-block; margin: 0px auto; text-align: center;}
h1 { font-size:28px;}
body { text-align: center; background-color: aliceblue; /*20240729*/ }
table { border-collapse: collapse; margin-left:auto; margin-right:auto;}
th { padding: 12px; background-color: #0000cd; color: white; border: solid 2px #c0c0c0;}
tr { border: solid 2px #c0c0c0; padding: 12px;}
td { border: solid 2px #c0c0c0; padding: 12px;}

.value { color:blue; font-weight: bold; padding: 1px;}

/* (1)情報表示窓 */
#msg_information{ white-space: break-spaces; max-width: 480px; margin-left:auto; margin-right:auto;
  font-size: 100%; text-align:left; border: 1px splid silver; padding: 1em;
  background-color:rgb(216, 216, 216); color: black;
}

/* (2)リモコン送信ボタン */
/* inline_1 */
.inline_1 {display: flex; justify-content: center; gap: 20px;}

.bt_1 {
  display:inline-block; width:100px; height:43px; padding:10px 10px; vertical-align: middle;
  text-decoration:none; font-size:16px; background-color:rgb(215,228,189); color: #000;
  border-bottom: solid 5px #627295; border-radius: 4px;}
.bt_1:active {
  -webkit-transform: translateY(0px); transform: translateY(0px); border-bottom: none;
}
.bt_2 {
  display:inline-block; width:100px; height:43px; padding:10px 10px; vertical-align: middle;
  text-decoration:none; font-size:16px; background-color:rgb(215,228,189); color: #000;
  border-bottom: solid 5px #627295; border-radius: 4px;}
.bt_2:active {
  -webkit-transform: translateY(0px); transform: translateY(0px); border-bottom: none;
}
.bt_3 {
  display:inline-block; width:100px; height:43px; padding:10px 10px; vertical-align: middle;
  text-decoration:none; font-size:16px; background-color:rgb(215,228,189); color: #000;
  border-bottom: solid 5px #627295; border-radius: 4px;}
.bt_3:active {
  -webkit-transform: translateY(0px); transform: translateY(0px); border-bottom: none;
}
.bt_4 {
  display:inline-block; width:100px; height:43px; padding:10px 10px; vertical-align: middle;
  text-decoration:none; font-size:16px; background-color:rgb(215,228,189); color: #000;
  border-bottom: solid 5px #627295; border-radius: 4px;}
.bt_4:active {
  -webkit-transform: translateY(0px); transform: translateY(0px); border-bottom: none;
}

/* inline_2 */
.inline_2 {display: flex; justify-content: center; gap: 20px;}

.bt_5 {
  display:inline-block; width:100px; height:43px; padding:10px 10px; vertical-align: middle;
  text-decoration:none; font-size:16px; background-color:rgb(215,228,189); color: #000;
  border-bottom: solid 5px #627295; border-radius: 4px;}
.bt_5:active {
  -webkit-transform: translateY(0px); transform: translateY(0px); border-bottom: none;
}
.bt_6 {
  display:inline-block; width:100px; height:43px; padding:10px 10px; vertical-align: middle;
  text-decoration:none; font-size:16px; background-color:rgb(215,228,189); color: #000;
  border-bottom: solid 5px #627295; border-radius: 4px;}
.bt_6:active {
  -webkit-transform: translateY(0px); transform: translateY(0px); border-bottom: none;
}
.bt_7 {
  display:inline-block; width:100px; height:43px; padding:10px 10px; vertical-align: middle;
  text-decoration:none; font-size:16px; background-color:rgb(215,228,189); color: #000;
  border-bottom: solid 5px #627295; border-radius: 4px;}
.bt_7:active {
  -webkit-transform: translateY(0px); transform: translateY(0px); border-bottom: none;
}
.bt_8 {
  display:inline-block; width:100px; height:43px; padding:10px 10px; vertical-align: middle;
  text-decoration:none; font-size:16px; background-color:rgb(215,228,189); color: #000;
  border-bottom: solid 5px #627295; border-radius: 4px;}
.bt_8:active {
  -webkit-transform: translateY(0px); transform: translateY(0px); border-bottom: none;
}

/* inline_3 */
.inline_3{display: flex; justify-content: center; gap: 20px;}

.bt_9 {
  display:inline-block; width:100px; height:43px; padding:10px 10px; vertical-align: middle;
  text-decoration:none; font-size:16px; background-color:rgb(215,228,189); color: #000;
  border-bottom: solid 5px #627295; border-radius: 4px;}
.bt_9:active {
  -webkit-transform: translateY(0px); transform: translateY(0px); border-bottom: none;
}
.bt_10 {
  display:inline-block; width:100px; height:43px; padding:10px 10px; vertical-align: middle;
  text-decoration:none; font-size:16px; background-color:rgb(215,228,189); color: #000;
  border-bottom: solid 5px #627295; border-radius: 4px;}
.bt_10:active {
  -webkit-transform: translateY(0px); transform: translateY(0px); border-bottom: none;
}
.bt_11 {
  display:inline-block; width:100px; height:43px; padding:10px 10px; vertical-align: middle;
  text-decoration:none; font-size:16px; background-color:rgb(215,228,189); color: #000;
  border-bottom: solid 5px #627295; border-radius: 4px;}
.bt_11:active {
  -webkit-transform: translateY(0px); transform: translateY(0px); border-bottom: none;
}
.bt_12 {
  display:inline-block; width:100px; height:43px; padding:10px 10px; vertical-align: middle;
  text-decoration:none; font-size:16px; background-color:rgb(215,228,189); color: #000;
  border-bottom: solid 5px #627295; border-radius: 4px;}
.bt_12:active {
  -webkit-transform: translateY(0px); transform: translateY(0px); border-bottom: none;
}

/* inline_4 */
.inline_4 {display: flex; justify-content: center; gap: 20px;}

.bt_13 {
  display:inline-block; width:100px; height:43px; padding:10px 10px; vertical-align: middle;
  text-decoration:none; font-size:16px; background-color:rgb(204,192,218); color: #000;
  border-bottom: solid 5px #627295; border-radius: 4px;}
.bt_13:active {
  -webkit-transform: translateY(0px); transform: translateY(0px); border-bottom: none;
}
.bt_14 {
  display:inline-block; width:100px; height:43px; padding:10px 10px; vertical-align: middle;
  text-decoration:none; font-size:16px; background-color:rgb(204,192,218); color: #000;
  border-bottom: solid 5px #627295; border-radius: 4px;}
.bt_14:active {
  -webkit-transform: translateY(0px); transform: translateY(0px); border-bottom: none;
}
.bt_15 {
  display:inline-block; width:100px; height:43px; padding:10px 10px; vertical-align: middle;
  text-decoration:none; font-size:16px; background-color:rgb(204,192,218); color: #000;
  border-bottom: solid 5px #627295; border-radius: 4px;}
.bt_15:active {
  -webkit-transform: translateY(0px); transform: translateY(0px); border-bottom: none;
}
.bt_16 {
  display:inline-block; width:100px; height:43px; padding:10px 10px; vertical-align: middle;
  text-decoration:none; font-size:16px; background-color:rgb(204,192,218); color: #000;
  border-bottom: solid 5px #627295; border-radius: 4px;}
.bt_16:active {
  -webkit-transform: translateY(0px); transform: translateY(0px); border-bottom: none;
}

/* (3)モード切換ボタン */
.bt_mode {display: inline-block; height:43px;}
.bt_mode label{display: block; background:aliceblue; color: blue;
  padding: 8px; margin: 0 auto; box-sizing: border-box; text-align: center;
  text-decoration: none;  cursor: pointer;}
.bt_mode input:checked+label{background:aliceblue; color: red;}
.bt_mode input{display: none;}

/* (4)制御ボタン ボタンの初期状態を背景色と同一(見えない状態)に設定する */
/* inline_c */
.inline_c {display: flex; justify-content: center; gap: 20px;}

.bt_c1 {display: inline-block; width:100px; height:43px;}
.bt_c1 label{display: block; background:aliceblue; color: aliceblue;
  padding: 8px; margin: 0 auto; box-sizing: border-box; text-align: center;
  text-decoration: none; border-bottom: solid;  border-radius: 5px; cursor: pointer;}
.bt_c1 input:checked+label{background:tomato; color: white;}
.bt_c1 input{display: none;}

.bt_c2 {display: inline-block; width: 100px; height:43px;}
.bt_c2 label{display: block; background:aliceblue;  color: aliceblue;
  padding: 8px; margin: 0 auto; box-sizing: border-box; text-align: center;
  text-decoration: none; border-bottom: solid; border-radius: 5px; cursor: pointer;}
.bt_c2 input:checked+label{background:tomato; color: white;}
.bt_c2 input{display: none;}

.bt_c3 {
  display:inline-block; width:100px; height:43px; padding:10px 10px; vertical-align: middle;
  text-decoration:none; font-size:16px; background-color:aliceblue; color: aliceblue;
  border:none; border-bottom: solid ; border-radius: 5px;}
.bt_c3:active {
  -webkit-transform: translateY(0px); transform: translateY(0px); border-bottom: none;
}

.bt_c4 {display: inline-block; width: 100px; height:43px;}
.bt_c4 label{display: block; background:aliceblue;  color: aliceblue;
  padding: 8px; margin: 0 auto; box-sizing: border-box; text-align: center;
  text-decoration: none; border-bottom: solid; border-radius: 5px; cursor: pointer;}
.bt_c4 input:checked+label{background:tomato; color: white;}
.bt_c4 input{display: none;}
図27 style.css
sytle.css にコードをペーストした結果です。(図28)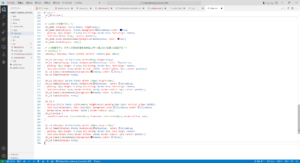
*図28 style.css にペーストした結果
ファームウエア ビルド
アリさんマークをクリックして PROJECT TASKS を表示します。 PROJECT TASKS から Biuld をクリックしてターミナル出力に [SUCCESS] と表示されたら完了です。(図29)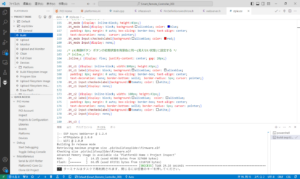
*図29 Build が完了した
ファイルシステムイメージ ビルド
PROJECT TASKS から Build Filesystem Image をクリックしてターミナル出力に [SUCCESS] と表示されたら完了です。(図30)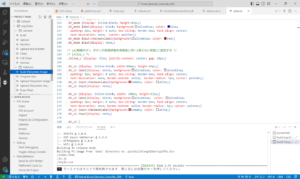
*図30 Build Filesystem Image が完了した
ファームウエア 書込み
ESP32-DevKitC-32E を USB ケーブルで PC に接続します。 PROJECT TASKS から Upload をクリックするとファームウェアの書込みが開始されて [SUCCESS] と表示されると完了です。(図31)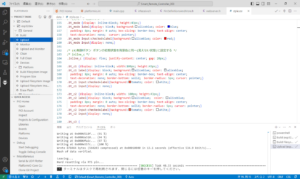
*図31 Upload が完了した
ファイルシステムイメージ 書込み
PROJECT TASKS から Upload Filesystem Image をクリックするとファイルシステムイメージの書込みが開始されて [SUCCESS] と表示されると完了です。(図32)
*図32 Upload Filesystem Image の完了
ファームウエア実行
PROJECT TASKS から Monitor をクリックするとファームウェアの実行が開始されて、ターミナルウインドウにメッセージが表示されます。(図33)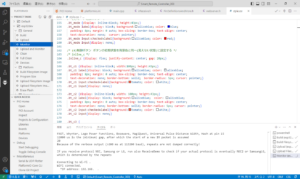
*図33 Monitor を開始した
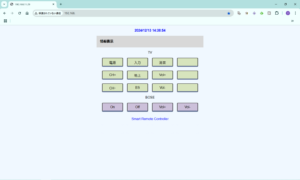
*図34 ブラウザに IP アドレスを入力して画面を表示した
リンク
ESP32を使って学習リモコンを作る(1) 学習リモコンでどんなことができるの?ESP32を使って学習リモコンを作る(2) ハードウエア
ESP32を使って学習リモコンを作る(3) ソフトウエア 赤外線リモコン受信( irReceive )
ESP32を使って学習リモコンを作る(4) ソフトウエア 赤外線リモコン送信( irSend )
ESP32を使って学習リモコンを作る(5) ソフトウエア webserver
ESP32を使って学習リモコンを作る(6) ソフトウエア FLASH 読書き(SPIFFS)
ESP32を使って学習リモコンを作る(7) ソフトウエア 本機のプロジェクト
ESP32を使って学習リモコンを作る(8) ソフトウエア 本機プロジェクトの勘所
ESP32を使って学習リモコンを作る(9) ハードウエア設計の勘所
ESP32を使って学習リモコンを作る(10) 学習リモコンを操作した時のターミナル出力
Smart_Remote_Controller プロジェクト GitHub (YI)
コメント